Disclosure: Some of the links on this page are affiliate links. This means that, at no additional cost to you, I may earn a small commission if you click through and make a purchase. I only recommend products that I personally use or believe will be helpful in emergency preparedness.
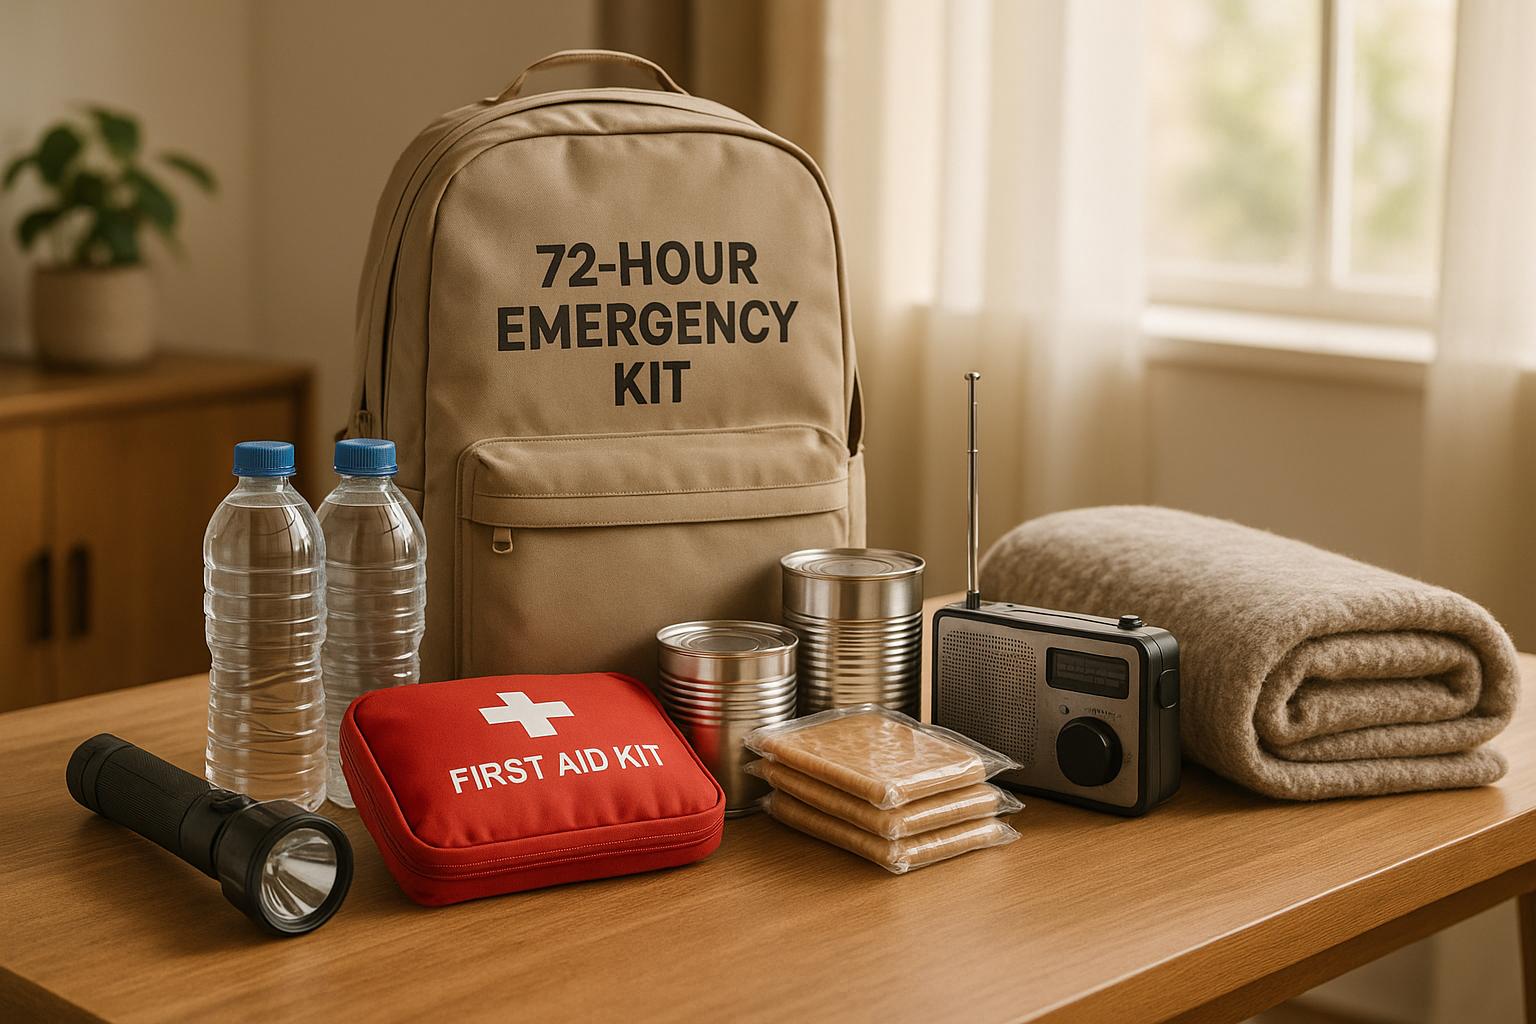
When disaster strikes, having a 72-hour emergency kit ready can be a lifesaver. This kit is designed to keep you and your family safe, nourished, and prepared for three days without outside help. Here’s a quick breakdown of what you need:
- Water: 1 gallon per person per day (3 days minimum). Include water for pets and consider portable storage options.
- Food: Non-perishable, ready-to-eat items like canned goods, dried fruits, peanut butter, and granola bars. Rotate supplies every 6–12 months.
- Health Supplies: A first aid kit, prescription medications (2-week supply), and chronic care items like glucose meters or inhalers.
- Clothing & Shelter: Weather-appropriate clothing, blankets, sleeping bags, and emergency bivvy sacks.
- Hygiene: Soap, hand sanitizer, baby wipes, garbage bags, and feminine hygiene products.
- Tools & Lighting: Flashlights, spare batteries, multi-tools, waterproof matches, and a hand-crank radio.
- Documents & Cash: Copies of IDs, insurance, medical records, and cash in small bills.
- Special Needs: Supplies for infants, elderly family members, or pets (e.g., diapers, formula, pet food).
Store your kit in a durable, portable container like a backpack or plastic bin and check it every six months to replace expired items. Keep kits in multiple locations – home, car, and work – for easy access.
Emergencies can happen anytime. Preparing now ensures you’re ready to protect your family during those critical first 72 hours.
40+ Items We Keep in Our 72 HOUR "BUG OUT" BAGS! How to make emergency kits for Kids, Dogs,& Adults
Water and Food Supplies
Water and food are the cornerstones of any emergency kit, ensuring you and your family can get through the critical first 72 hours of a crisis.
Water Storage and Requirements
Plan for 1 gallon of water per person per day for three days. For a family of four, that means at least 12 gallons. If you have pets, pregnant family members, or live in a hot climate, you’ll need extra.
The safest option is unopened, commercially bottled water. For a space-saving alternative, consider commercially filled water pouches. If you’re filling your own containers, use FDA-approved, food-grade materials that seal tightly. Be sure to clean, label, and replace water every six months. Store containers in a cool, dark place, away from sunlight and chemicals.
For portability, pack water in airtight plastic bags inside containers like plastic bins or duffel bags. If freezing temperatures are a concern, leave some space in bottles – fill them only ¾ full to allow for expansion. Collapsible water bags or Mylar water containers are also great options for evacuation scenarios.
Non-Perishable Food Items
Your emergency food supply should focus on items that don’t require refrigeration, need minimal preparation, and use little to no water. As of January 2025, the USDA suggests stocking up on items like dried fruit, canned fruits and vegetables, shelf-stable meats, peanut butter, granola bars, crackers, nonfat dry milk, and juice boxes.
"In an emergency, generally you tend to think of meeting more basic needs than preferences and flavors. But if you plan right, you can have a great variety of foods and nutrients."
- Elizabeth Andress, Professor Emerita and Extension Food Safety Specialist at the University of Georgia
Choose lightweight, ready-to-eat options like canned meats, trail mix, and MREs (Meals Ready to Eat). High-energy foods such as peanut butter and comfort items like cookies or hard candy can help maintain morale during stressful times. Military and camping supply stores often carry compact, long-lasting meal options designed for emergencies.
"Dried fruits provide you with a significant amount of nutrients and calories."
- Barry Swanson, Professor Emeritus of Food Science at Washington State University
Store dry foods in clean, dry, and dark spaces to avoid moisture damage. Canned goods are especially handy since they’re less likely to be affected by floodwaters compared to jars. Don’t forget a manual can opener for any canned items in your kit. Regularly inspect and rotate your food supply every 6–12 months to ensure freshness.
| Food Category | Examples | Storage Notes |
|---|---|---|
| Canned Goods | Meats, fruits, vegetables, soups | Check for rust, leaks, or bulging; clean and sanitize if exposed to floodwaters |
| Dried Foods | Fruits, nuts, trail mixes | Store in airtight containers to prevent oxidation and moisture |
| Grains | Pasta, rice, cereals | Use sealed glass or plastic containers to keep pests out |
| Other | Peanut butter, granola bars, jelly | Check expiration dates; peanut butter doesn’t need refrigeration after opening |
Pet Food and Supplies
Your pets are part of the family, so their needs should be included in your emergency planning. Store at least a three-day supply of water specifically for your pets. For example, a 50-pound dog needs about 50 ounces of water daily, or roughly 3 gallons over three days.
Pack a three-day supply of your pet’s regular food, along with bowls and treats.
"When you file a complaint about a pet food, the lot number and ‘best by’ date, along with the full product name, are important for you to provide."
- Lauren Carey, Veterinarian and Pet Food Expert at FDA
If you transfer dry pet food to another container, make sure it’s clean, dry, and has a tight lid. Store both dry and canned pet food in a cool, dry place below 80°F. For added protection, place unopened bags of pet food into food-grade airtight buckets.
Build your pet food supply gradually by buying a little extra during regular shopping trips. Rotate your stock at least once a year to avoid spoilage, and label containers with the date they were filled.
Next, we’ll cover the essential health and medical supplies to complete your 72-hour kit.
Health and Medical Supplies
Disasters often lead to medical emergencies, making it crucial to have the right health supplies on hand. Whether you’re treating minor injuries or managing chronic health conditions, being prepared can make a big difference.
First Aid Kit Essentials
A well-prepared first aid kit can help you handle many common injuries and emergencies. Start with adhesive bandages in different sizes, sterile gauze pads, and medical tape for wound care. Add antiseptic wipes, hydrogen peroxide, or rubbing alcohol to clean cuts and reduce the risk of infection.
You’ll also want disposable gloves to protect yourself while treating wounds, and tweezers for removing splinters or debris. A digital thermometer is useful for monitoring fevers, while instant cold packs can help with sprains or bruises – no refrigeration needed.
Don’t forget tools like scissors for cutting bandages, safety pins for securing dressings, and a small flashlight to examine injuries in dim lighting. Stock up on over-the-counter medications such as pain relievers like acetaminophen or ibuprofen, antihistamines for allergic reactions, and anti-diarrheal tablets. For more complex situations, consider adding a triangular bandage, elastic wraps for sprains, and burn gel or aloe vera for heat-related injuries. A first aid manual is also a smart addition, offering guidance when professional help is delayed.
In addition to immediate care items, think about long-term needs. Include prescription medications and chronic care supplies to ensure you’re covered beyond the initial emergency.
Medications and Health Supplies
Aside from first aid basics, it’s important to have a supply of prescription medications and condition-specific items. Experts recommend keeping at least a two-week supply of all necessary medications to weather a crisis. If a storm or disaster is expected, ask your pharmacy about early refills to avoid running out.
"Ensure you have an adequate supply of medications and medical equipment (e.g., glucose meters, inhalers, oxygen tanks). Consider asking your pharmacy or doctor about early refills during storm warnings." – Optimize Health, 2024
Store medications in their original labeled containers and place them in a waterproof bag to protect them. Keep a list of all medications, including dosages, prescribing doctors, and pharmacy contact information, in case you need refills or medical assistance.
If you have a chronic condition, make sure you have the supplies specific to your treatment. For instance, diabetes patients should stock up on blood glucose monitoring tools, fast-acting glucose sources like tablets, and insulated bags with cold packs to keep insulin at the correct temperature if refrigeration isn’t available. Heart disease and hypertension patients should have enough medications like beta-blockers or nitroglycerin, along with a portable blood pressure monitor. Asthma and COPD patients will need emergency inhalers, nebulizers with backup power, and air-purifying masks for poor air quality. For those with kidney disease requiring dialysis, it’s critical to have a backup plan and contact details for alternative facilities or mobile dialysis units if your usual center is inaccessible.
Don’t overlook other personal health items. Pack extra eyeglasses or contact lenses, cleaning solutions, hearing aid batteries, and mobility aids if needed. Also, keep copies of important medical documents – such as insurance cards, medical history, emergency contacts, and advance directives – stored in a waterproof container.
Collaborate with your healthcare provider to create a tailored emergency health plan. This ensures you can continue managing your health even during disruptions, helping you stay on track with your treatment needs during difficult times.
Tools, Communication, and Lighting
In an emergency, the right tools and communication devices can be the difference between staying safe and dealing with unnecessary risks. These items help you handle small repairs, stay connected, and signal for help when regular systems fail.
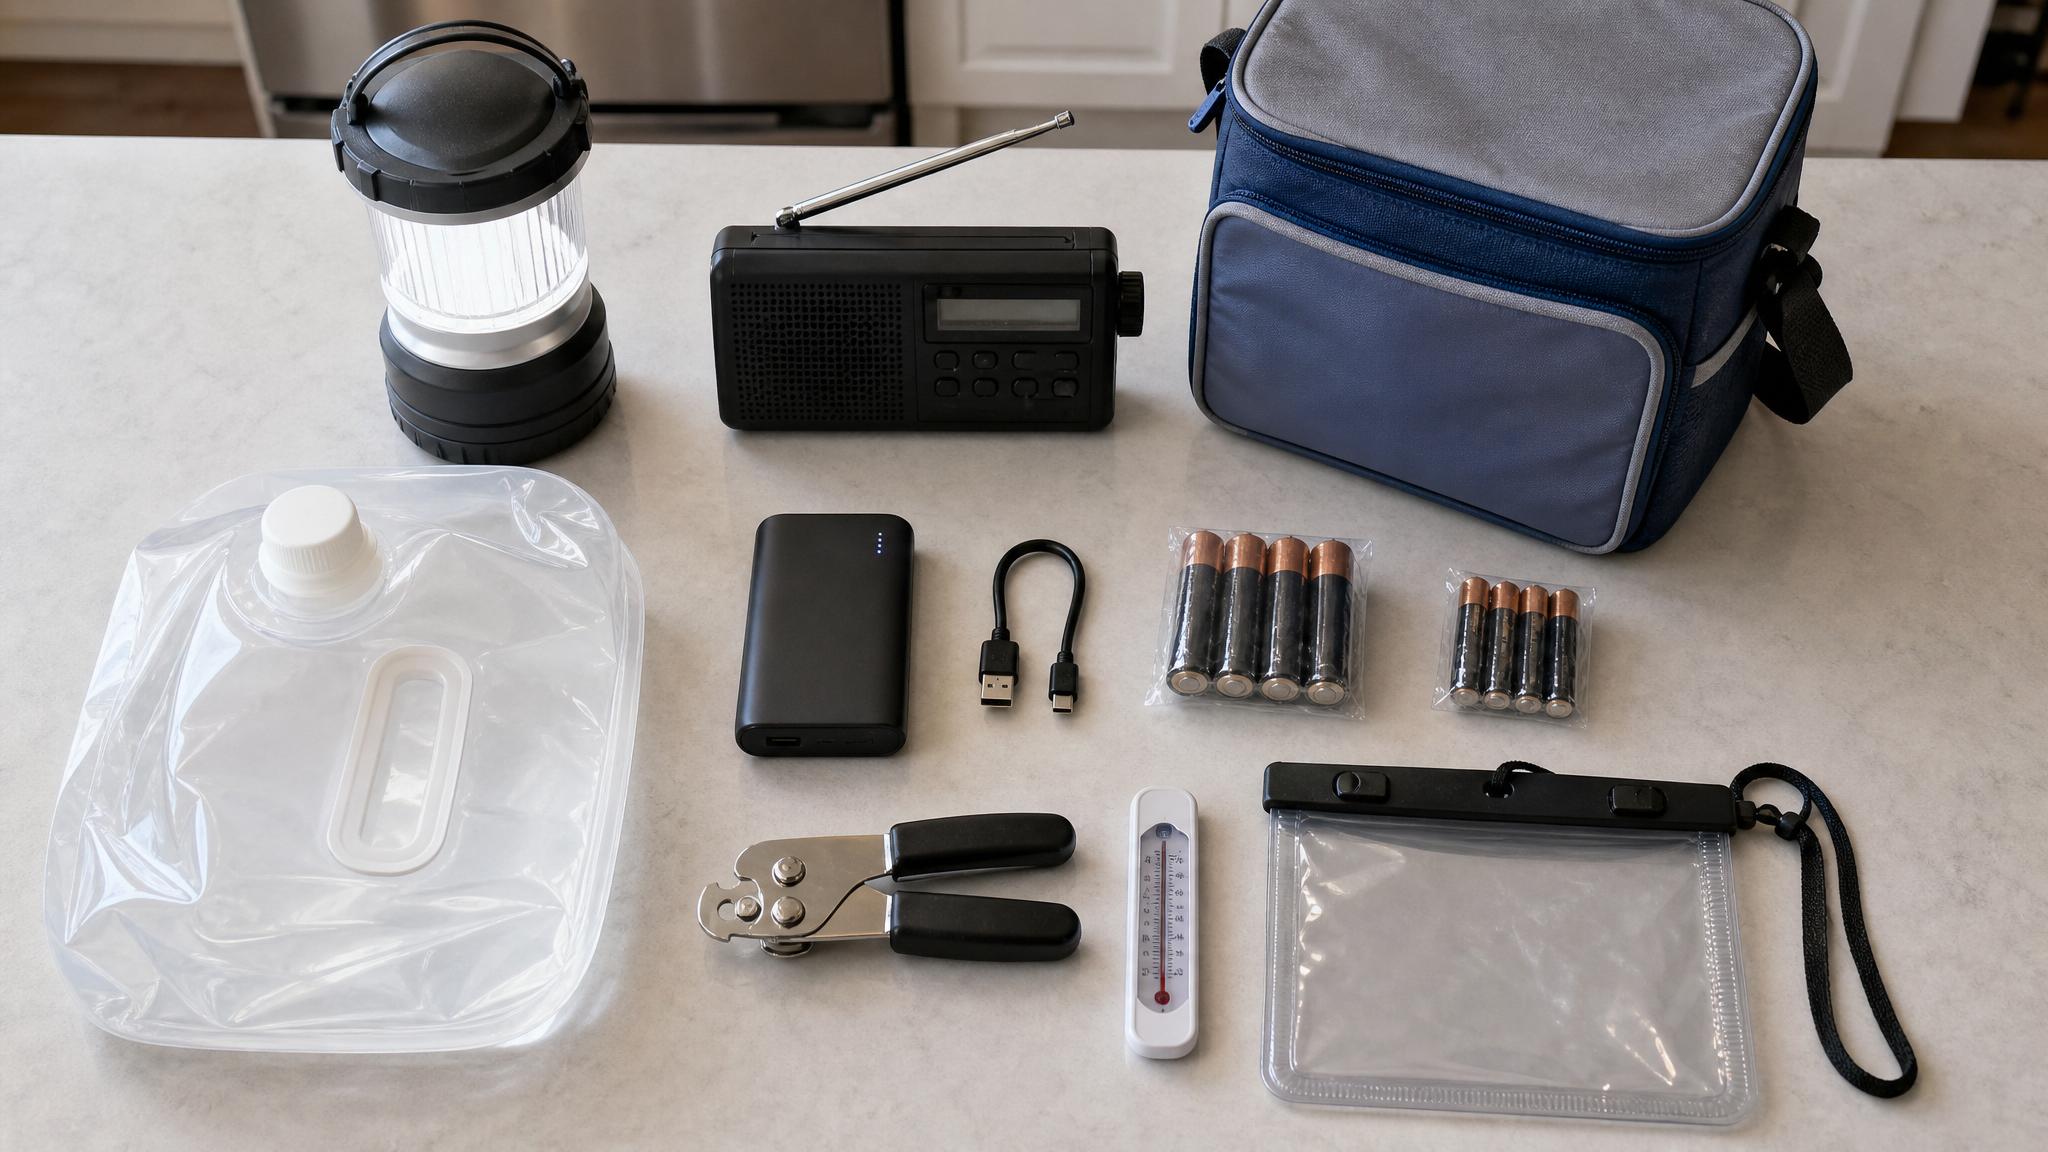
Lighting and Power Sources
Power outages are a common issue during emergencies, so having reliable lighting is absolutely essential. It’s smart to have multiple options in case one fails. Pack battery-powered flashlights and headlamps for hands-free use. For added reliability, include hand-crank or magnetic induction flashlights – these are lifesavers when batteries run out and spares aren’t available.
Disposable LED flashlights can serve as backups, and it’s helpful to standardize your devices to use a single battery type, like AA, to simplify your kit. Don’t forget to pack plenty of spare batteries. Look for lighting devices with multiple modes, such as low-power settings, which can conserve battery life during extended use.
To keep your devices running, include portable power banks and car adapters. A solar generator is another great addition, especially for charging CB radios and other electronics when access to electricity is limited.
Once your lighting needs are covered, focus on tools and fire starters to round out your kit.
Multi-Use Tools and Fire Starters
When space is tight, multi-purpose tools are a smart choice. A good multi-tool combines essentials like pliers, knives, and screwdrivers into one compact device, making it a must-have in any emergency kit. The American Red Cross even highlights the importance of including a multi-purpose tool in survival gear.
Fire starters are another essential. Waterproof matches or a sturdy lighter are great options, especially ones designed to work in wet conditions. Fire can be a lifesaver in cold weather, allowing you to stay warm, cook food, or purify water. Alongside your fire starters, pack a whistle for signaling – it’s a simple but effective tool.
For home safety tasks, tools like wrenches or pliers can help you shut off utilities such as gas or water if needed. Ready.gov emphasizes the importance of these tools in emergency preparedness.
Finally, staying connected during a crisis is just as critical as having the right tools.
Communication and Emergency Alerts
Keeping informed during an emergency is crucial. A battery-powered or hand-crank radio should be at the top of your communication list. These radios can receive emergency broadcasts even when cell towers and power grids go down. Shortwave radios are another reliable option, providing updates when other systems fail.
While cell phones are useful, they have limitations during disasters. Text messages are more likely to go through than voice calls because they require less bandwidth. For local communication, two-way radios are a reliable and cost-effective solution, offering contact within a couple of miles without subscription fees.
In remote areas or for long-range communication, amateur "Ham" radios are a solid choice. They can connect directly or use repeaters to extend their range, though they do require a license. For global coverage, satellite phones are the most dependable option, as they connect directly to orbiting satellites.
GPS messenger beacons are another valuable tool, allowing you to send distress signals along with your exact location to rescue teams.
Keep in mind that disasters often disrupt communication due to damaged infrastructure, power outages, or overloaded networks. Having multiple ways to communicate significantly improves your chances of staying connected when it matters most.
Clothing, Shelter, and Hygiene
When it comes to emergencies, staying warm, dry, and clean isn’t just about comfort – it’s about survival. Proper clothing shields you from harsh weather, while good hygiene helps ward off illness, especially when medical help may be unavailable. These essentials form a crucial part of any 72-hour kit.
Weather-Appropriate Clothing
Pack at least one full set of layered, weather-appropriate clothing for each person in your group. Store these in airtight bags to keep them dry and ready to use. When choosing clothing, prioritize durable, climate-suited options.
Natural fibers like denim, silk, and wool are often preferred because they’re less flammable than synthetic blends. However, avoid cotton for base layers – it traps moisture and can leave you feeling colder in chilly conditions. Instead, use a layering system:
- Base layer: Opt for moisture-wicking materials like polyester, polypropylene, or merino wool (140–200 g/m²).
- Mid-layer: Choose insulating fabrics such as fleece, merino wool, or thicker polyester (260–320 g/m²).
- Outer layer: Look for weatherproof shells with windproof construction, an attached hood, and insulation like synthetic or down fill (800+ cubic inches or 250+ grams).
Tailor your clothing to your specific climate. For cold areas, pack thermal layers, wool socks, waterproof boots, gloves, and hats. In hot, humid regions, lightweight, breathable fabrics like linen or cotton work best, along with a wide-brimmed hat for sun protection. In desert conditions, long-sleeved but lightweight clothing and UV-blocking gear are vital. For rainy climates, waterproof jackets and quick-drying clothes are a must. Don’t forget to cover extremities – hats, gloves, and socks are essential for maintaining warmth.
Packing extra socks (especially wool for colder areas) and choosing darker, low-profile colors can also be helpful. These measures ensure you’re prepared for the elements until you can secure proper shelter.
Shelter and Warmth Items
Temporary shelter is another critical part of your emergency kit. Blankets and sleeping bags rated for your local climate are essential. Space blankets, which reflect body heat, are compact and highly effective. For extra warmth, include hand and foot warmers that last for hours in cold weather, as well as emergency bivvy sacks – lightweight, waterproof covers that help retain body heat.
While staying warm and sheltered is vital, maintaining hygiene in these situations is equally important.
Personal Hygiene Items
Good hygiene isn’t just about feeling clean – it’s key to preventing illness and maintaining morale during emergencies. Washing hands with soap and water is the best way to stop the spread of disease. When water isn’t available, use alcohol-based hand sanitizers with at least 60% alcohol as an alternative.
Your kit should include essentials like toilet paper, feminine hygiene products, hand sanitizer, paper towels, garbage bags, and basic cleaning supplies. When water is limited, baby wipes or bath wipes are a practical substitute for bathing. Don’t overlook oral hygiene – pack toothbrushes, toothpaste, and use treated water for brushing. Moist towelettes and garbage bags with plastic ties are also useful for maintaining sanitation.
For portable handwashing, include a water dispenser, soap, paper towels, and sanitizer. Proper waste disposal is crucial to avoid outbreaks of diseases like typhoid, dysentery, and cholera. A simple two-bucket system can separate liquid from solid waste. Add disinfecting wipes and extra cleaning supplies to keep your environment as sanitary as possible.
sbb-itb-1a93acd
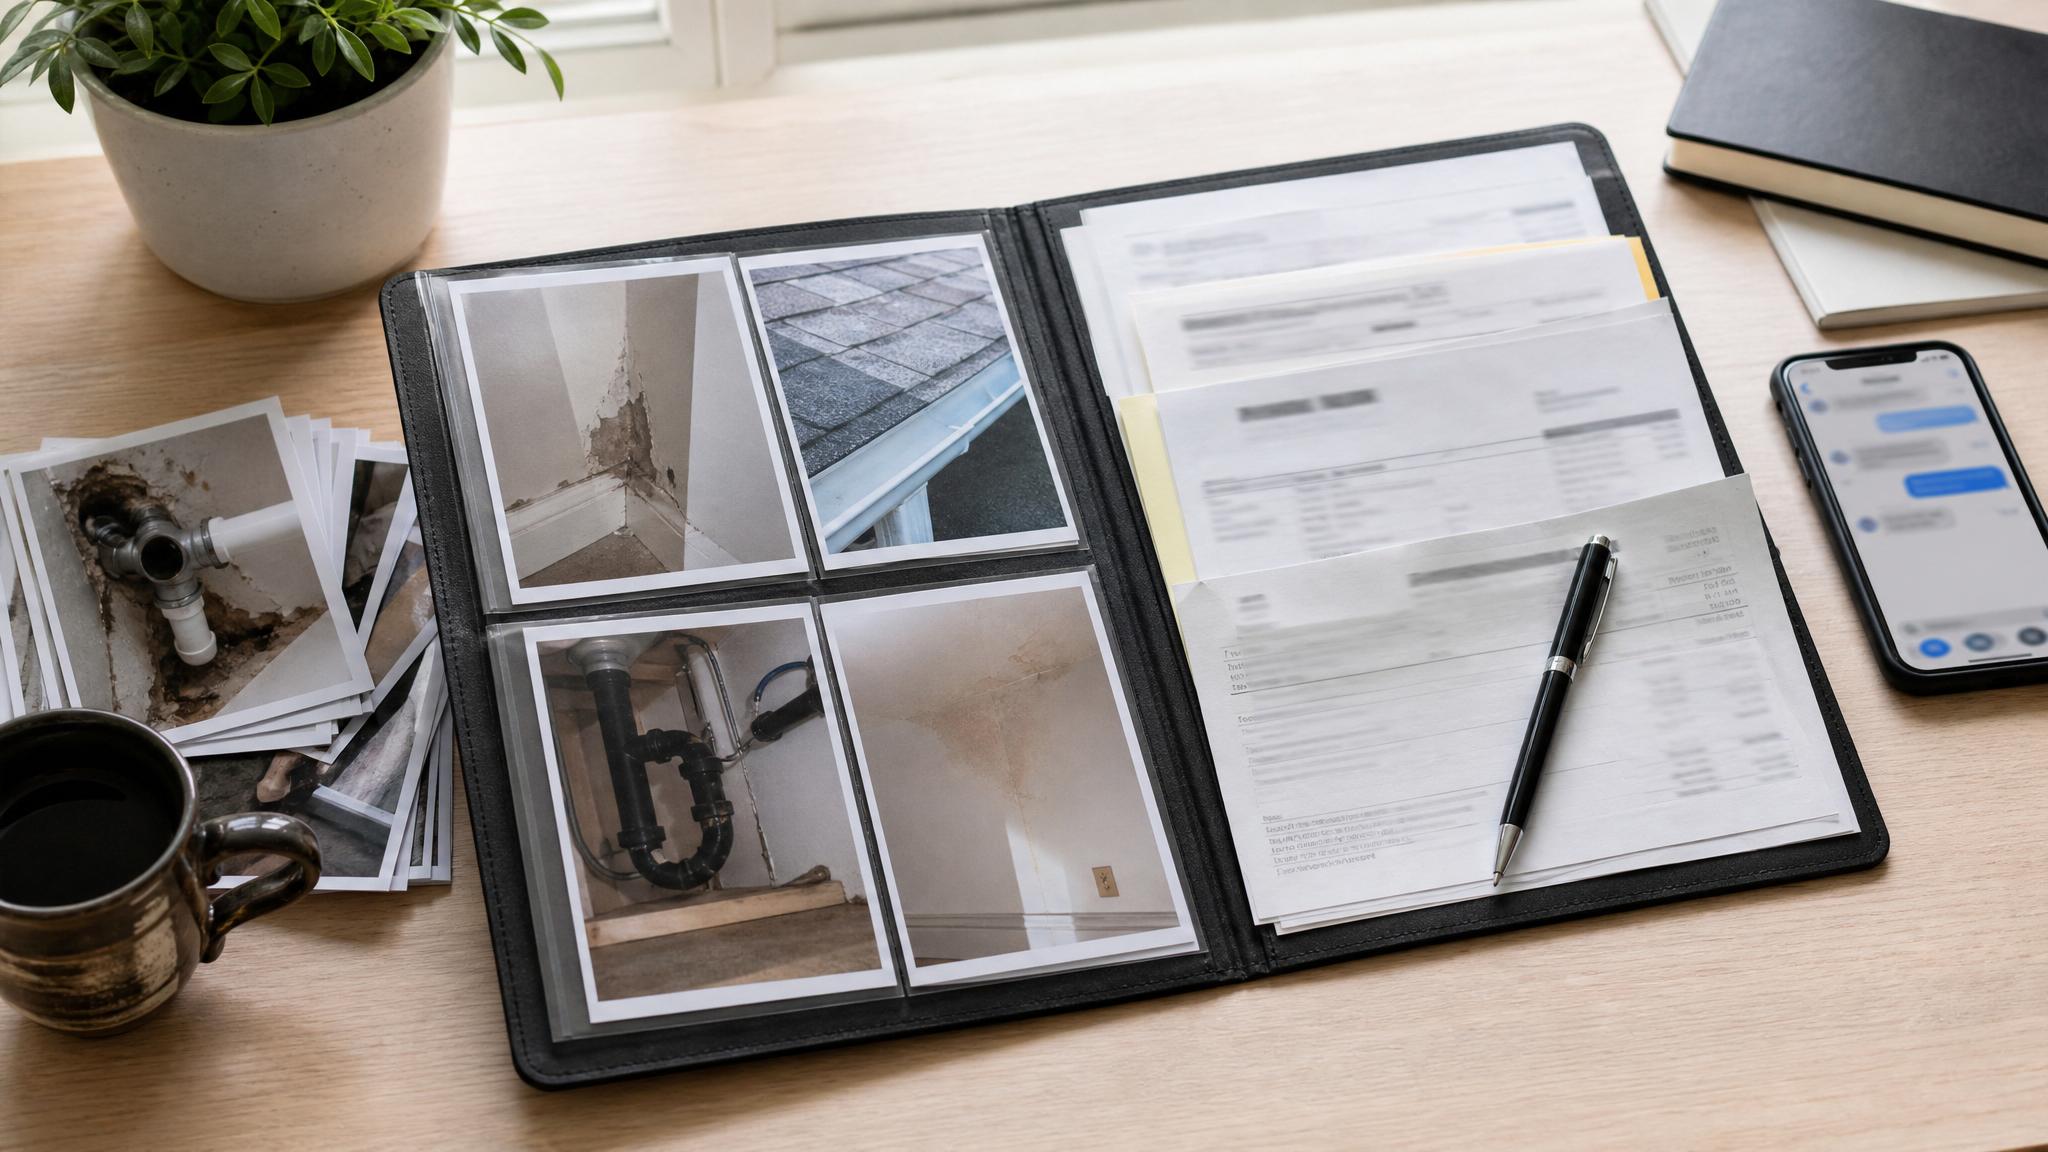
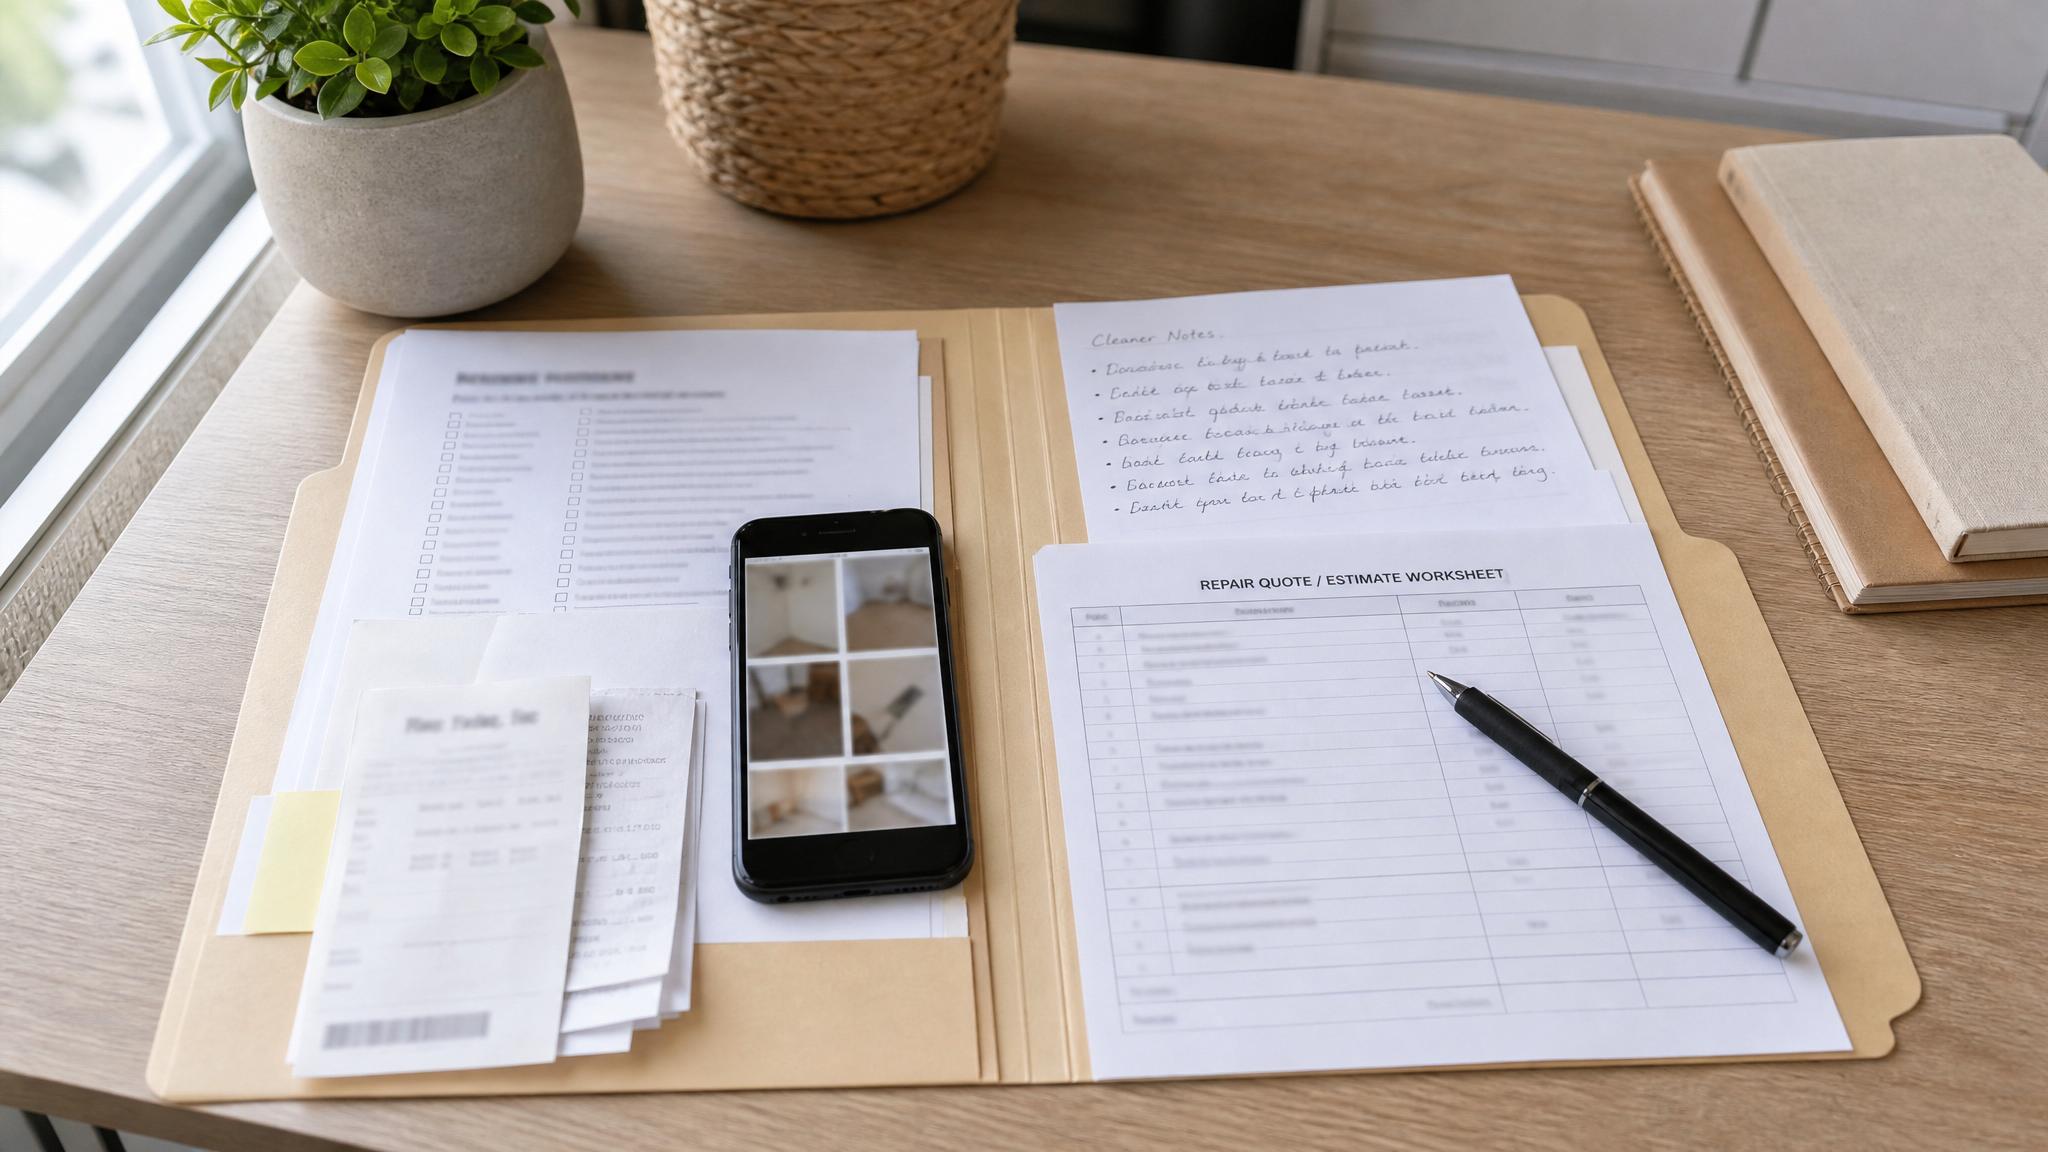
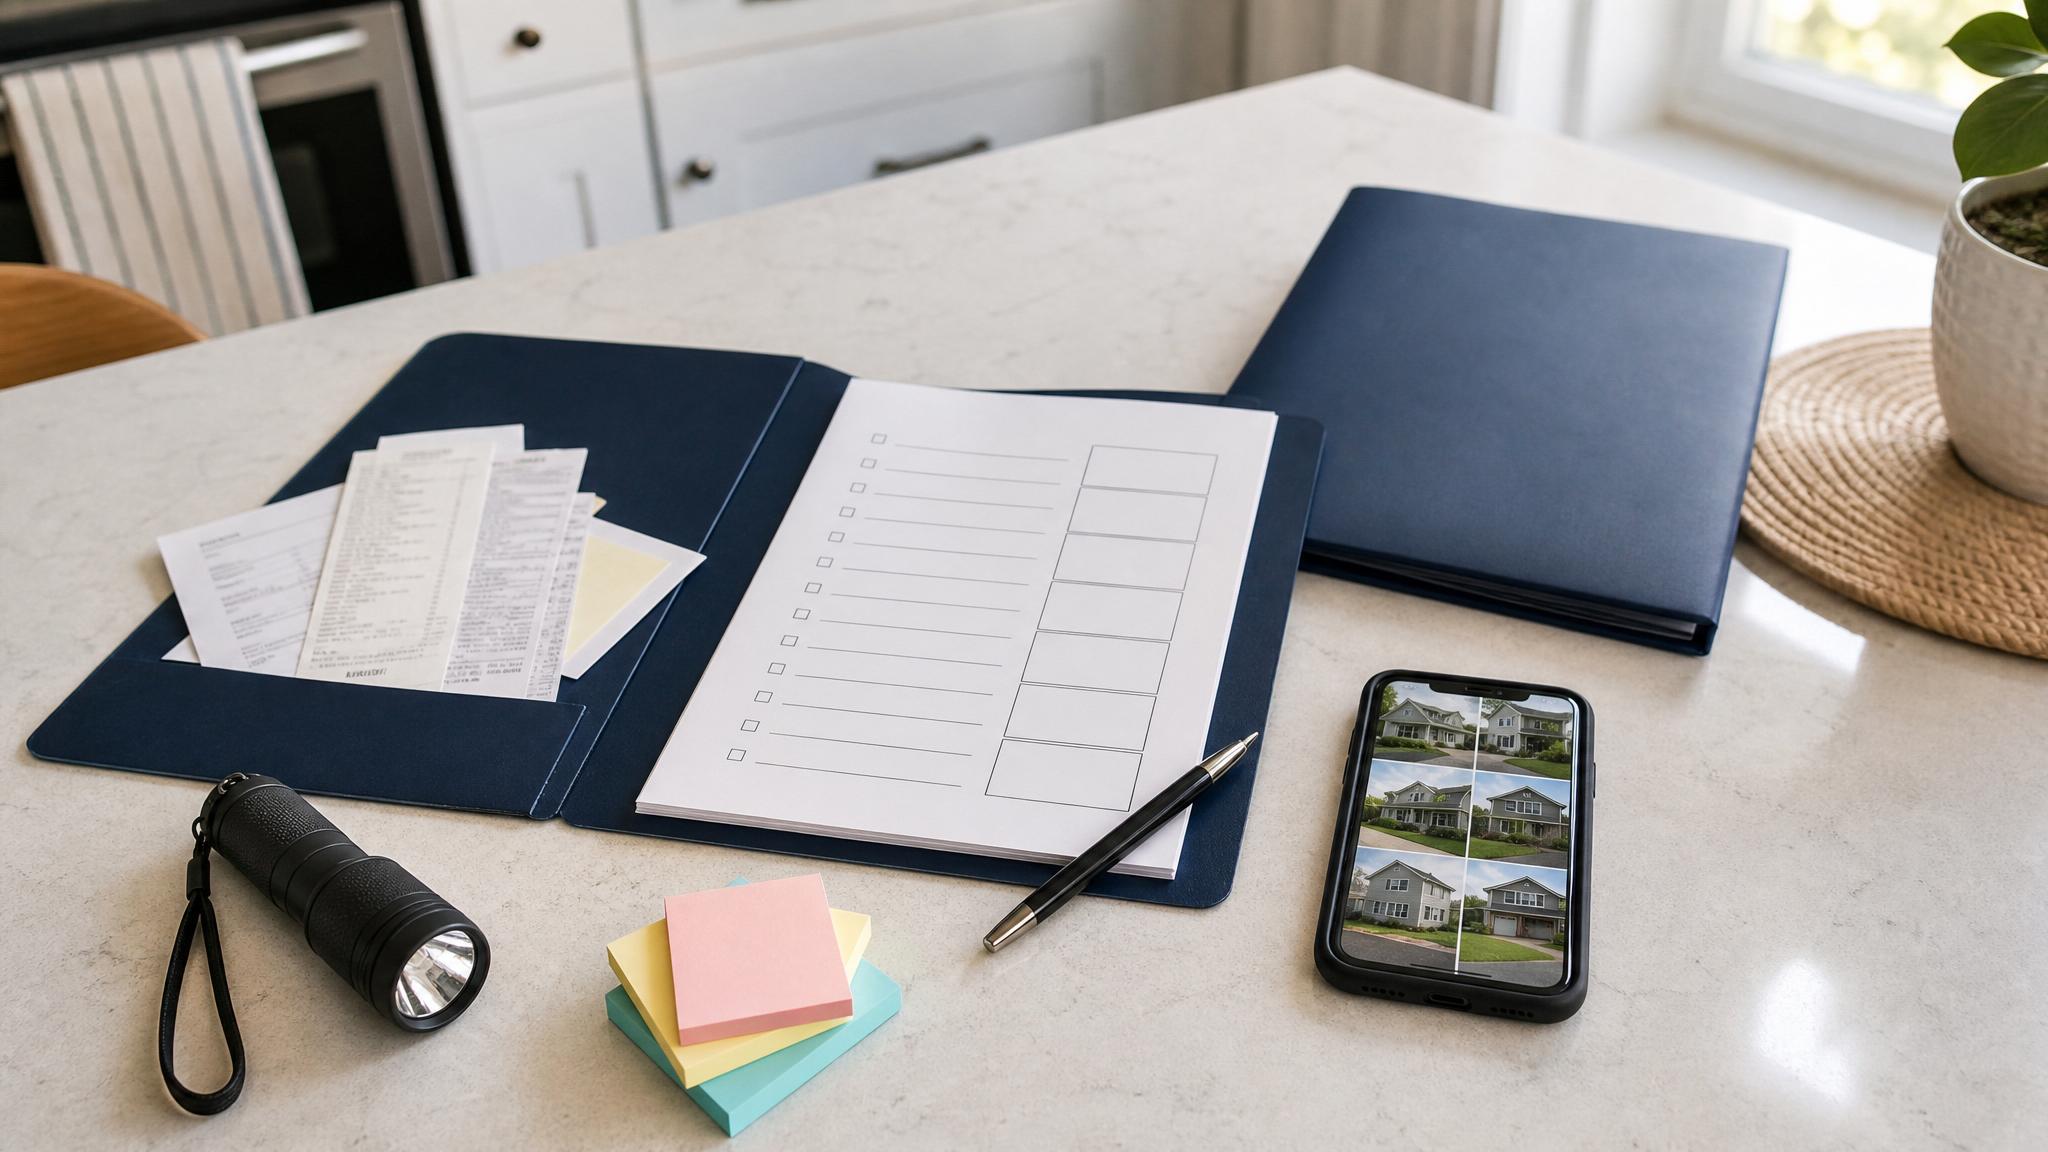
Important Documents and Cash
Having essential paperwork and cash readily available can make a huge difference when electronic systems go down. These items are crucial for quickly restoring financial and identity functions during emergencies. Alongside your survival supplies, your emergency kit should include documents necessary for identification, insurance claims, and financial transactions in situations where digital systems fail.
"When it comes to preparing for weather emergencies or other disasters, financial readiness is as important as a flashlight with fully charged batteries."
Securing Important Documents
Start by gathering copies of key documents such as IDs, insurance policies, medical records, bank statements, tax documents, property deeds, and other vital records. Store these in a waterproof container to protect them from damage. For added security, keep original documents – except for wills – in a safe deposit box or another secure location. Don’t forget to include a list of physicians with their contact information and labels from prescription medications.
Creating a household inventory is another smart step. Use photos or videos to document your belongings, and include family photos for identification purposes. A personal address book with emergency contacts can also prove invaluable.
When it comes to storage, think compact and secure. For instance, you can reduce document sizes to fit into a small 4×6-inch photo album for portability. As a backup, scan your documents and save them on a password-protected flash drive or secure cloud storage.
"Deciding what to store on a cloud is a question of picking the documents that ‘the risk of not having is higher than the risk of someone getting into it.’" – Thorin Klosowski, Security and Privacy Activist, Electronic Frontier Foundation
Protection is just as important as storage. U.S. fire departments respond to around 346,800 house fires every year, so double-bagging your documents in waterproof pouches is a wise move. Consider using a lockable, fireproof file box for added safety, and keep it in an accessible yet secure location. For digital accounts, enable two-factor authentication and use strong, unique passwords.
Make it a habit to update your document copies every six months or whenever significant changes occur. Additionally, review your emergency kit at least once a year to ensure everything is current and in good condition.
Don’t overlook the importance of cash in emergencies.
Storing Emergency Cash
When digital payment systems are down, cash becomes indispensable for essentials like fuel, food, and lodging. Credit card machines and ATMs may be out of service, so keeping cash in your emergency kit is a must. Opt for small bills, as businesses may struggle to provide change during a crisis.
Aim to have at least five days’ worth of cash in small denominations, like $1 and $5 bills, along with rolls of quarters. Divide the cash into different compartments of your kit to avoid keeping it all in one place. This approach can also help in bartering situations if needed.
If you’re preparing 72-hour kits for each family member, ensure each kit includes some cash. Store the money in waterproof pouches or bags alongside your documents to protect it from damage.
Finally, tailor the total cash amount to your family’s specific needs. Think about potential expenses, including hotel stays, meals, or any special requirements for family members with medical conditions or dietary restrictions. Planning ahead ensures you’re better equipped to handle unexpected costs during an emergency.
Special Considerations for Different Needs
Every household has its own unique requirements when it comes to emergency preparedness. While essentials like water, food, and shelter are universal, families with infants, seniors, or individuals with disabilities need to plan for additional supplies. Taking these extra steps ensures that everyone in your home is ready to face unexpected challenges.
Supplies for Infants and Toddlers
When preparing for the youngest members of your family, it’s important to pack items that address their specific needs for feeding, hygiene, and comfort.
For feeding, if your baby isn’t exclusively breastfed, include ready-to-feed formula in single-serving containers – this avoids the need to mix formula with potentially unsafe water. If powdered formula is your choice, pack containers, a measuring cup, a mixing container, and enough clean water for preparation. Don’t forget extra bottles and nipples in case some are lost or damaged.
Hygiene is another priority. Include a large pack of diapers, two packs of wipes, baby powder, diaper rash cream, baby wash, lotion, and resealable bags for disposing of soiled items.
For nutrition, pack nonperishable baby food and snacks that are appropriate for your child’s age. Add two pacifiers (if they use them), extra clothing in a size up, and a couple of extra blankets for warmth and comfort. To sanitize feeding supplies, consider including a small camp stove, fuel, and a pot for boiling water. Other helpful items include infant pain reliever (acetaminophen), a bulb syringe, an infant thermometer, and your child’s medical and vaccination records.
Elderly or Disabled Care Items
Seniors and individuals with disabilities may face unique challenges during emergencies, so planning for their needs is essential.
Start with a 30-day supply of medications and any extra assistive items they may require, such as a cane, eyeglasses, or hearing aids. For medications needing refrigeration, talk to your doctor about alternative storage options or substitute medications in case of power outages. Similarly, consult with your doctor about backup equipment like a manual wheelchair or a non-electric oxygen tank. Don’t forget to stock extra batteries for power-dependent devices.
If special dietary needs are part of the equation, include foods in your emergency kit that align with those requirements.
Communication is also critical. Develop an emergency communications plan with backup methods for staying in touch if power or internet services fail. Keep cell phones charged and identify trusted individuals who can assist during a crisis. You might also want to include medical information cards and communication assistance cards to help first responders understand specific needs.
Entertainment and Stress Relief
Emergencies can be emotionally taxing for everyone. Finding ways to stay calm and occupied can make a big difference for both children and adults during uncertain times.
Books are a fantastic offline option for entertainment. Pack a few favorites for each family member – picture books for young children and novels or magazines for adults.
Interactive activities like card games, travel-sized board games, or puzzle books are great for keeping the family engaged. Coloring books and crayons can be soothing for kids – and even for adults.
Comfort items are another way to ease anxiety. Include a favorite stuffed animal, blanket, or small toy for children. Adults might find stress balls or meditation guides helpful for managing tension.
While electronic devices can offer entertainment, don’t rely on them exclusively. If you include tablets or handheld gaming devices, pack portable chargers or extra batteries. Be sure to download offline games, audiobooks, or other content ahead of time, as internet access may be unavailable.
Storage and Organization Tips
Having the right supplies is only part of the equation – how you store and organize your emergency kit plays a huge role in its effectiveness when disaster strikes. A well-organized, properly maintained, and easily accessible kit can mean the difference between calm and chaos during those critical first 72 hours.
Choosing the Right Container
The container you choose matters. It needs to be tough, portable, and protective. Your supplies should stay organized, easy to access, and safe from damage, even if things get hectic.
When picking a container, focus on durability. Look for sturdy materials like reinforced plastics, metals, or waterproof fabrics. Make sure the container is spacious enough for your essentials but still manageable to carry. Handles or straps are a big plus for portability, and designs that allow quick access to supplies are ideal.
| Container Type | Pros | Cons | Best For |
|---|---|---|---|
| Backpacks | Hands-free portability; easy to carry; multiple compartments | Limited capacity; may not be fully waterproof; less crush protection | Mobile families or quick evacuations |
| Plastic Bins | Water-resistant; stackable; crush-proof; clear contents visibility | Heavy when full; awkward to carry; needs separate transport method | Home storage or families with vehicle transport |
| Duffel Bags | Good capacity; flexible shape; lightweight | Less structure for organization; may absorb moisture; limited crush protection | Those balancing capacity and portability |
For added convenience, consider containers with built-in compartments or waterproof seals. Some even double as seating, flotation devices, or come with solar-powered chargers.
A smart approach is to use backpacks or duffel bags for portability and then store them inside crush-resistant, waterproof bins when at home. This setup ensures both organized storage and readiness for evacuation.
Maintaining and Rotating Supplies
Your emergency kit isn’t a "set it and forget it" deal. Regular upkeep is key to keeping your supplies fresh and functional. Plan to check and restock your kit every six months. Replace food items with "best by" dates approaching within six months and swap out expired or damaged goods. Batteries should also be inspected – replace any leaking ones and consider swapping out unused batteries every three to five years.
Store your kit in a cool, dry spot away from direct sunlight. Heat, moisture, and UV rays can shorten the shelf life of items like food and water. For example, water stored in plastic bottles should be kept off concrete floors using cardboard or wood to prevent chemicals from leaching into the water.
Keep a log of your inspections and updates. Replace bleach if it’s more than a year old, and if you use anything from the kit, restock it immediately. Don’t forget to review and update your first aid kit and important documents annually, as even information like contact details can become outdated.
Designating a Storage Location
Where you store your emergency kit is just as important as what’s inside. The best spot is somewhere you’d naturally seek shelter, like a basement, interior room, or closet. It should also be easy to grab in case you need to evacuate quickly.
Choose a dedicated location and make sure everyone in your household knows where it is. Avoid piling other items on top of the kit, as that could slow you down in an emergency. A coat closet near the entryway is a good option for quick access, or you might keep a kit under your bed for easy reach during nighttime emergencies.
For full preparedness, consider storing kits in multiple locations – home, work, and your car. A work kit can be a lifesaver if disaster strikes during office hours. A car kit is equally important, especially during evacuations. Just be mindful of protecting food and water from the high temperatures inside a vehicle, as heat can shorten their shelf life. Strategically placing your kits ensures they’re always accessible when you need them most.
Conclusion: Staying Prepared for the Unexpected
Putting together a 72-hour emergency kit is about taking charge of your family’s safety during uncertain times. In the aftermath of a major disaster, relief efforts can take up to three days to arrive, and densely populated areas may face additional delays due to gridlock and logistical challenges.
This kit is more than just a collection of food, water, and first aid supplies. The first 72 hours after a disaster are often the most critical, as emergency services might be stretched thin and supply chains disrupted. Having a well-stocked kit ensures that your family stays safe, nourished, and informed without relying on outside help during this crucial period.
Beyond the practical benefits, being prepared can also ease the mental strain of an emergency. Knowing you have the essentials covered allows you to focus on making calm, rational decisions when it matters most.
To keep your kit effective, check and replace expired items every six months and review your emergency plan annually. While many items have a shelf life of 5 to 10 years, regular updates ensure everything is in working order when you need it most.
It’s important to customize your kit based on your household’s specific needs. Whether you’re preparing for an individual, a family with young children, elderly members, or pets, your kit should reflect those unique requirements. Additionally, consider your local climate and the types of disasters that are most likely in your area when assembling your supplies.
For added preparedness, store kits in multiple locations – at home, in your car, and in a portable backpack – so you’re ready for various scenarios. By taking these steps now, you’re not just investing in supplies; you’re investing in peace of mind and the safety of those you care about most.
Emergencies can happen without warning. With a well-maintained and accessible emergency kit, you’ll be ready to handle any crisis, knowing you’ve done everything possible to safeguard your loved ones.
FAQs
How often should I inspect and refresh my 72-hour emergency kit to keep it ready for use?
You should check and update your 72-hour emergency kit every six months. This routine helps ensure that essentials like food, water, and batteries are still in good condition. Swap out any expired or damaged items, and adjust the kit to meet any changes in your needs – whether that’s adding new medications or switching out clothing for the current season. Staying on top of these updates keeps your kit ready and dependable when it matters most.
What’s the best way to store and organize my 72-hour emergency kit so it’s easy to access during an emergency?
To ensure your 72-hour emergency kit is ready when you need it, store it in sturdy, portable containers like backpacks or heavy-duty plastic bins. Keep the kit in a specific, easy-to-access spot, such as a closet near an exit or in your garage. Make sure everyone in your household knows exactly where to find it.
Organize the contents by category – like food, water, first aid supplies, and tools – using clear plastic bags or color-coded pouches. This method helps you grab what you need quickly in an emergency. If you live in an area prone to flooding or other disasters, consider using waterproof and crush-resistant containers for extra protection. A well-organized, portable setup can make evacuations faster and less stressful.
What should I include in a 72-hour emergency kit for infants, elderly family members, or pets?
When putting together a 72-hour emergency kit for households with infants, elderly family members, or pets, it’s crucial to include specific items tailored to their individual needs.
For infants, stock up on essentials like baby formula, bottles, diapers, wipes, a warm blanket, and any necessary medications. Elderly family members may require items such as mobility aids, prescription medications, extra eyeglasses, hearing aid batteries, and comfort items to help them stay at ease. For pets, don’t forget to pack pet food, water, any required medications, a leash or carrier, waste bags, and something familiar like a favorite toy or blanket to help calm them during stressful situations.
Store these items in waterproof containers, ensuring they’re easy to grab in a hurry. Keeping separate, clearly labeled kits for each group can help you stay organized and make it easier to meet everyone’s needs during the crucial first 72 hours of an emergency.
Related posts
Frequently Asked Questions
What is a 72-hour emergency kit?
A 72-hour emergency kit contains enough supplies to sustain you and your family for three days without outside help. It typically includes water, non-perishable food, a flashlight, first aid kit, battery-powered radio, medications, copies of important documents, cash, and basic tools.
How much food should be in a 72-hour kit?
Pack at least three days of non-perishable food per person. Choose items that require little or no cooking such as energy bars, canned goods, peanut butter, crackers, and dried fruit. Include a manual can opener and ensure all foods account for dietary restrictions in your household.
Where should I store my 72-hour emergency kit?
Store your kit in a cool, dry place that is easy to access quickly such as a hallway closet, garage, or under a bed. Keep a smaller version in your car. Avoid areas prone to flooding or extreme temperature swings, which can degrade food and batteries.
How often should I update my 72-hour emergency kit?
Review and refresh your kit at least once a year. A good habit is to do it every time you change your clocks. Replace expired food and water, update medications, and make sure documents reflect your current information. Check battery-powered items to ensure they still work.