Disclosure: Some of the links on this page are affiliate links. This means that, at no additional cost to you, I may earn a small commission if you click through and make a purchase. I only recommend products that I personally use or believe will be helpful in emergency preparedness.
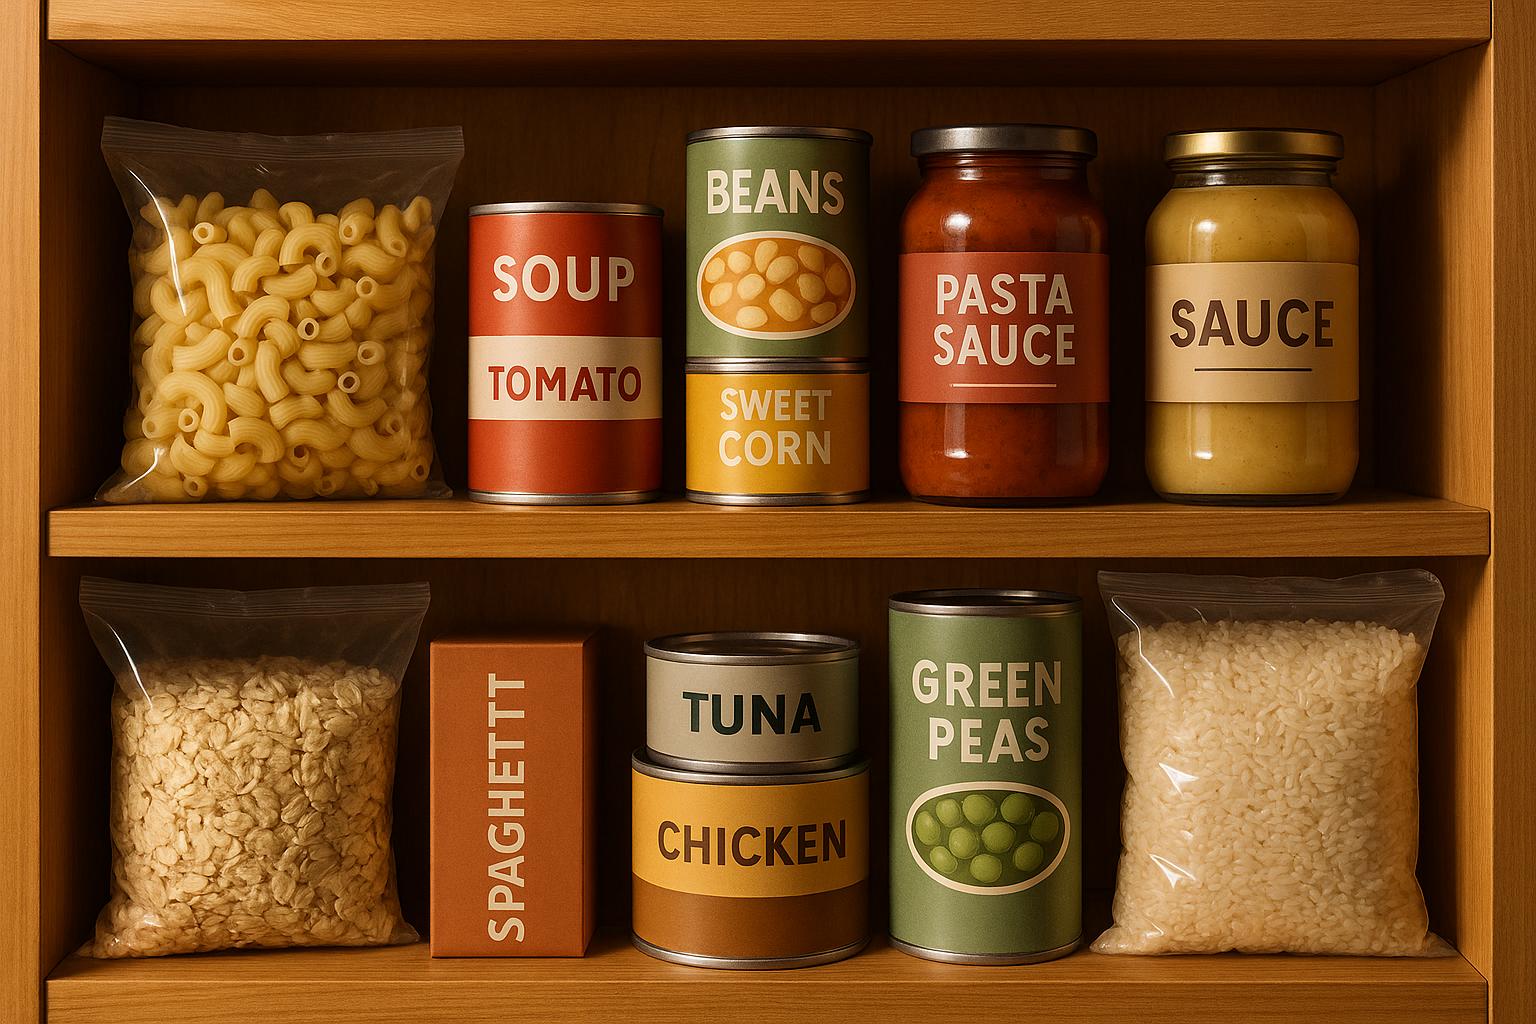
When emergencies hit, having shelf-stable meals can make all the difference. These meals last long, require little to no preparation, and provide essential nutrition when fresh food isn’t available. Here are 10 reliable options to include in your emergency supply:
- Peanut Butter and Crackers: High in protein and healthy fats; no cooking needed. Watch for allergens like peanuts and gluten.
- Canned Tuna or Chicken Salad Kits: Long shelf life and rich in protein and omega-3s. Minimal prep required.
- Bean Salad Wraps or Dips: Packed with fiber and plant-based protein. Easy to prepare with canned beans.
- Instant Oatmeal with Dried Fruit: Quick energy from complex carbs and vitamins. Just add water.
- Emergency Tortilla Pizza: Customizable with long-lasting ingredients like tortillas, sauce, and canned toppings.
- Southwest Sweet Potato Stew: Nutrient-dense with vitamins and fiber; can be canned or frozen.
- Ready-to-Eat Soups and Stews: Simple to heat or eat straight from the can. Look for low-sodium options.
- Granola Bars and Trail Mix: Portable snacks packed with energy, protein, and healthy fats.
- MREs (Meals Ready-to-Eat): Complete meals with a long shelf life. Self-heating or ready to eat cold.
- Jerky and Dried Fruit Packs: High-protein jerky paired with nutrient-rich dried fruits for quick energy.
Quick Comparison:
| Meal Option | Shelf Life | Prep Needed | Nutritional Highlights | Common Allergens |
|---|---|---|---|---|
| Peanut Butter & Crackers | 6–12 months (crackers) | None | Protein, healthy fats | Peanuts, gluten |
| Canned Tuna/Chicken Salad Kits | 2–5 years | Minimal | Protein, omega-3s | Fish, eggs, soy |
| Bean Salad Wraps/Dips | 2–5 years (canned beans) | Light | Fiber, plant protein | None |
| Instant Oatmeal & Dried Fruit | 12–18 months | Add water | Fiber, vitamins | Gluten (some brands) |
| Emergency Tortilla Pizza | 6–12 months (tortillas) | Light cooking optional | Carbs, customizable | Gluten, dairy |
| Southwest Sweet Potato Stew | 2–5 years (canned) | Heat optional | Fiber, vitamins A & C | None |
| Ready-to-Eat Soups/Stews | 2–5 years (canned) | Heat optional | Balanced nutrients | Varies by product |
| Granola Bars & Trail Mix | 6–12 months | None | Energy, protein, fiber | Nuts, gluten, soy |
| MREs | 5–10 years | None/self-heating | Complete meal, 1,200+ cal | Varies by entrée |
| Jerky & Dried Fruit Packs | 6–12 months | None | Protein, vitamins | Soy, gluten, nuts |
Keep your emergency food supply organized, check expiration dates regularly, and store items in a cool, dry place. These meals will help ensure your family stays nourished and prepared during any crisis.
Easy Emergency Meals to Prep and Store with Shelf Stable Ingredients
Key Factors for Choosing Emergency Shelf-Stable Meals
When it comes to stocking up on emergency shelf-stable meals, there are several important aspects to think about. These range from how long the food lasts and how it’s stored, to how easy it is to prepare, its nutritional value, and the specific needs of your household. Let’s dive into what you should keep in mind.
Shelf Life and Storage Requirements are the backbone of any emergency food plan. For instance, Mountain House freeze-dried meals promise to stay tasty for up to 30 years. On the other hand, canned fruits and vegetables typically last 1–3 years, oats about two years, pasta 1–3 years, and dried beans can essentially last forever while offering a great source of fiber and protein. To get the most out of your food’s shelf life, store it in a cool, dry, and dark area – ideally between 50–70°F. Keep everything off the ground to avoid moisture and pests, and use resealable containers to lock in freshness.
Minimal Preparation Requirements are critical in situations where utilities like electricity or gas might not be available. Look for foods that don’t need refrigeration, require little to no prep, and don’t use much water. Ready-to-eat meals are especially handy when cooking isn’t an option. Avoid anything that demands a lot of water or complex preparation steps.
Nutritional Balance is key to keeping everyone energized and healthy during emergencies. Aim to include at least one well-rounded meal per day. A balanced supply should contain proteins, vegetables, fruits, dairy, and grains. For canned goods, choose fruits packed in 100% juice and vegetables canned in water to cut down on added sugars.
"A well-prepared supply of food provides peace of mind, knowing that you have access to nutritious and shelf-stable foods that can sustain you and your family members until normal conditions are restored." – Mountain House
Family-Specific Considerations are essential for tailoring your emergency food supply. Think about the unique needs of each household member – this could include allergies, dietary restrictions, or specific preferences. Always check ingredient labels to avoid allergens or unsuitable ingredients. Don’t forget to include comfort foods like cookies, hard candy, or sweetened cereals to help boost morale during tough times.
Storage and Rotation Management is all about keeping your food fresh and safe. Use the FIFO (First-In, First-Out) method to ensure older items are used before newer ones. Label everything with purchase dates, and inspect your stockpile every six months. If an item doesn’t have a use-by date, jot one down when you buy or open it. Incorporating these foods into your regular meals can also help you stay familiar with them while maintaining freshness.
Practical Storage Tips can help you make the most of your space and keep everything organized. Lightweight, compact options are easier to store and manage. Military surplus or camping supply stores often carry long-lasting, space-saving food options. Don’t forget essential tools like a manual can opener, scissors, or disposable plates and utensils. Keeping a detailed log of your inventory, including purchase and expiration dates, makes managing your emergency food supply much easier.
1. Peanut Butter and Crackers
Peanut butter and crackers are a dependable, no-fuss meal option, especially in emergencies. This simple combination doesn’t require any prep, provides solid nutritional benefits, and offers a comforting snack when times get tough. With its mix of protein, healthy fats, and carbohydrates, it’s a great way to stay fueled when you need energy the most.
Shelf Life
Peanut butter is known for its impressive shelf life when stored correctly. An unopened jar can last 6–9 months in the pantry, while an opened one stays good for about 3 months at room temperature or 6–9 months in the fridge. To keep it fresh, store peanut butter in a cool, dark, and dry spot.
Crackers, on the other hand, don’t hold up as well. Food safety expert Donna Grant explains:
"Generally speaking, it is the crackers that are more of an issue than the peanut butter".
While crackers won’t spoil in a dangerous way, they can go stale relatively quickly. Regularly rotating your supply and checking for freshness can help maintain their quality.
If you’re looking for longer-lasting options, highly processed peanut butter tends to stay fresh longer than natural varieties. Powdered peanut butter, with its reduced fat content, might be an even better choice for extended storage.
Preparation Required
One of the best things about this meal? It’s completely hassle-free. Just open the jar, grab some crackers, and you’re good to go. There’s no need for water, cooking, or special tools, making it perfect for situations where utilities are unavailable or when you need a quick snack on the move.
Nutritional Highlights
Peanut butter packs a punch when it comes to nutrition. Just two tablespoons provide 8 grams of protein and 188 calories, along with monounsaturated fats, fiber, vitamin E, and magnesium for sustained energy. Pair it with whole-grain crackers, and you’ve got a well-rounded snack that keeps you going.
Allergen Considerations
While peanut butter and crackers are a convenient option, it’s important to account for potential allergens. Peanuts are one of the top 9 most common food allergens in the U.S., making this meal unsuitable for those with peanut allergies. Many crackers also contain wheat, which includes gluten – a concern for individuals with celiac disease or gluten sensitivity.
For alternatives, try sunflower seed butter or oat butter as peanut-free options. Tree nut butters (like almond butter, if allergies aren’t an issue) and seed spreads made from sesame, sunflower, or pumpkin seeds are also great substitutes. For those avoiding wheat, gluten-free crackers made from rice, corn, or tapioca flour are widely available. Always read labels carefully to check for allergens, and remember: it’s safer to skip a meal than risk an allergic reaction during an emergency.
2. Canned Tuna or Chicken Salad Kits
Canned tuna and chicken salad kits offer a convenient, protein-packed meal option that’s ready to eat right out of the package. These shelf-stable options combine the nutritional benefits of fish or poultry with easy-to-use packaging, making them a go-to choice for emergencies when cooking isn’t an option.
Shelf Life
One of the key advantages of canned tuna is its long shelf life. Standard cans can last up to 4 years, while pull-top cans have a shelf life of about 3 years. Tuna, salmon, and chicken pouches typically stay fresh for three years when stored correctly.
To preserve their quality, store these items in a cool, dry area, away from heat sources like stoves or sinks. Temperatures below 85°F are ideal. Always check the "Best By" date to ensure you’re consuming the product at its peak quality.
The U.S. Department of Agriculture clarifies:
"’Best By,’ ‘Best if Used By,’ and ‘Use By’ dates on commercially packaged foods sold in the United States are not food safety dates. Provided voluntarily by manufacturers, they are an indication of how long products are likely to remain at peak quality."
Once you open a can, manufacturers like StarKist recommend transferring leftovers to a food-safe container, refrigerating them, and eating within two days. In emergency situations where refrigeration isn’t available, it’s best to consume opened cans immediately.
With their extended shelf life and no need for cooking, these kits are a practical, ready-to-eat option for emergencies.
Preparation Required
These kits require almost no effort to prepare. There’s no need for cooking, heating, or even adding water – just open the package and enjoy. Some kits come with extras like crackers, mayonnaise packets, or seasoning, which might involve minimal mixing, but they’re still incredibly simple to use.
This makes them perfect for situations where utilities are unavailable or when you need a quick, filling meal without any hassle.
Nutritional Highlights
Canned tuna and chicken are packed with nutrients that make them excellent choices for emergency meals. Tuna is a lean protein source that supports muscle repair, tissue building, and helps you feel full longer. It’s also rich in omega-3 fatty acids (DHA and EPA), which are known for their role in reducing inflammation, supporting brain health, and lowering the risk of heart disease.
The amount of omega-3s varies depending on the type of tuna:
- Skipjack tuna: 90-160 mg per serving
- Yellowfin tuna: Around 250 mg per 4 oz. serving
- Albacore tuna: 200-300 mg per 4 oz. serving
Tuna also provides essential nutrients like vitamin D and selenium, which contribute to overall health.
Registered dietitian Laura M. Ali highlights its benefits:
"Canned tuna is a healthy lean protein that is full of nutrients that are good for your heart, mind, and body! This pantry staple is something you can feel good about adding to your meals or enjoying as a snack a few times a week so go ahead and dive right in!"
Allergen Considerations
While convenient, canned tuna and chicken salad kits may contain allergens that require close attention. Fish allergies are a common concern, and tuna is one of the top finned fish that can trigger reactions in sensitive individuals.
Here’s a breakdown of potential allergens found in these kits:
| Allergen | Possible Sources in Tuna/Chicken Salad Kits |
|---|---|
| Fish | Tuna |
| Egg | Mayonnaise |
| Wheat | Crackers |
| Soy | Mayonnaise |
| Milk | Buttermilk crackers |
| Sesame | Possible trace contaminant |
| Nuts | Possible trace contaminant |
| Peanuts | Possible trace contaminant |
Always read ingredient labels carefully. Some products may contain trace amounts of allergens due to shared manufacturing equipment, even if they’re not listed as main ingredients. For instance, Chicken of the Sea Packet Up!® Tuna Salad Kit includes multiple allergens such as sesame seeds, crustaceans, wheat, eggs, fish, soy, milk, tree nuts, and peanuts.
If you have food allergies, it’s safer to prepare your own emergency meals or opt for alternative protein sources to avoid any risks during stressful situations.
3. Bean Salad Wraps or Dips
Bean salad wraps and dips are a flexible and nutritious meal option, perfect for emergency situations. You can enjoy them as wraps using tortillas or as dips paired with crackers or chips. This versatility makes them a great addition to your emergency food supply, adding variety and nutritional balance to your stockpile.
Shelf Life
Dry beans, the cornerstone of many bean salad recipes, are well-known for their impressive shelf life when stored correctly. For instance, dry beans kept in standard polyethylene bags can last for over a year. With more advanced storage methods, their longevity increases significantly:
- Dry beans in Number 10 cans: Up to 30 years
- Vacuum-sealed in glass canning jars: 25–30 years
- Mylar bags with oxygen absorbers: 25–30 years
A study from BYU revealed that pinto beans stored for as long as 30 years still had over 80% acceptance from a taste panel evaluating them for emergency use. To ensure maximum freshness, store your beans in a cool, dry, and dark environment. While older beans may take longer to cook due to moisture loss, they retain their nutritional value.
Preparation Required
Preparing bean salad wraps and dips is quick and straightforward, making them ideal for situations requiring minimal effort. Simply drain and rinse canned beans, then microwave them for 30–45 seconds if desired. Mash the beans with a fork to create a base for your recipe.
Kristy Turner shares her favorite no-fuss recipe:
"My go-to recipe when I haven’t the energy to do anything but collapse on the couch and watch Downton Abbey is to combine mashed avocado with mashed white beans and a few other ingredients and roll it up in lavash or stuff it into tacos or a sandwich. I’ve also been known to eat it with a spoon. The whole thing comes together really quickly…"
For an even easier option, mix beans with shelf-stable dressings and dried herbs when fresh ingredients aren’t available.
Nutritional Highlights
Bean salads are a powerhouse of nutrition, offering a mix of fiber, protein, and essential micronutrients. Beans are naturally low in fat and deliver plant-based protein, vitamins, minerals, and antioxidants. For example:
- Pinto beans (1 cup): 18 grams of fiber, 14 grams of protein
- Black beans (½ cup): 70 calories, 5 grams of protein, 7 grams of fiber
- Lentils (½ cup): 115 calories, 9 grams of protein, 8 grams of fiber
Registered dietitian nutritionist Erica Baty highlights their benefits:
"Beans are about 60% to 70% carbohydrate, 20% to 30% protein, and very, very low in fat. It’s a very beneficial carbohydrate, while also providing that plant-based protein."
In addition to macronutrients, beans supply key minerals like magnesium, iron, and folate. For instance, one cup of cooked lentils provides 18% of your daily magnesium needs. Their high fiber and protein content makes them filling, helping to curb hunger longer than many other low-calorie foods. Beans also act as prebiotics, supporting gut health, digestion, and nutrient absorption.
Allergen Considerations
Though bean salad wraps and dips are generally well-tolerated, it’s important to keep potential allergens in mind. For example, tortillas may contain wheat, and some dressings might include soy or eggs. If you’re new to high-fiber foods, it’s best to increase your intake gradually. Start with a simple mix – like one type of bean, a vegetable, and a basic dressing such as oil and vinegar – to ease into it and identify any sensitivities. Tailor these recipes to suit your family’s dietary preferences and needs.
4. Instant Oatmeal with Dried Fruit
Instant oatmeal with dried fruit is a quick and reliable source of energy, especially in emergencies. It combines complex carbohydrates, fiber, and essential nutrients in a convenient, low-effort meal – perfect when cooking options are limited.
Shelf Life
Plain dried oats can last up to 30 years if stored in airtight containers with oxygen absorbers. However, oatmeal with added ingredients like dried fruit, nuts, or sugar has a shorter shelf life. Dehydrated fruits, when stored under ideal conditions, can remain good for up to 25 years. To extend the shelf life, store oatmeal in Mylar bags or glass containers with oxygen absorbers, keeping it away from light and moisture. Ensure storage temperatures stay at room temperature or below, and that the food’s moisture content is under 10% to avoid risks like botulism. These storage practices make instant oatmeal a dependable option for long-term use.
Preparation Required
Preparing instant oatmeal with dried fruit couldn’t be easier. Just add hot water or milk, making it a go-to choice when resources are scarce. If heating isn’t an option, cold water or milk works too – it just takes a bit longer to soak. For extra convenience, pre-portion servings into jars or bags and consider adding powdered milk so you only need water. To prepare, combine the contents with 2/3 cup of water or milk, microwave for about 1.5 minutes, or pour boiling water over it and let it sit for 15 minutes. This simplicity ensures you’ll have a nourishing meal ready in no time.
Nutritional Highlights
Oatmeal is more than just easy to make – it’s packed with essential nutrients. A single cup provides 307 calories, 10.7g of protein, and 8.18g of fiber. Its beta-glucan content supports gut health, helps regulate blood sugar, and lowers cholesterol. Oats also contain avenanthramides, powerful antioxidants that promote heart health. Adding dried fruit boosts the meal’s nutritional value, delivering concentrated carbohydrates along with important vitamins and minerals.
Allergen Considerations
To avoid hidden allergens, stick to plain oatmeal and customize it with your own toppings. Pre-flavored varieties may contain unwanted additives or allergens. For those concerned about blood sugar levels, steer clear of sugar-sweetened dried fruits. If you’re sensitive to gluten, opt for certified gluten-free oats to avoid cross-contamination with wheat. These adjustments ensure a safe and healthy meal for everyone.
5. Emergency Tortilla Pizza
Emergency tortilla pizza is a quick, comforting meal that uses long-lasting ingredients, making it ideal for stressful situations. It combines the ease of shelf-stable ingredients with the satisfaction of a hot, customizable dish – a great option for families needing a familiar and convenient bite.
Shelf Life
Commercially packaged tortillas can last 6–8 months in the freezer, while homemade ones only keep for 2–3 days at room temperature. Corn tortillas tend to hold up slightly better, staying fresh for 7–10 days in the pantry, 6–8 weeks in the fridge, and 6–8 months in the freezer.
To maximize shelf life, store tortillas in airtight containers before freezing. Their longevity comes from packaging, moisture control, pH levels, and preservatives that help prevent mold. When planning your emergency supplies, base your rotation schedule on the item with the shortest shelf life.
Preparation Required
This meal is as simple to prepare as it is to store. Start by layering sauce, cheese, and your choice of toppings on a tortilla. Then heat it using whatever cooking method you have available.
- Microwave: Heat the tortilla for one minute before adding toppings for a crispier base.
- Skillet: Preheat with a little oil to achieve a crispy bottom.
The microwave is the fastest option, but a skillet or oven adds extra texture. Keep tortillas, sauce, cheese, and shelf-stable toppings like canned meats or dried veggies in your emergency kit for a quick assembly.
Nutritional Highlights
A serving of tortilla pizza (about 146g) packs a solid nutritional punch: 441 calories, 27g of fat, 27g of carbohydrates, and 24g of protein. This makes it a good source of protein and calcium, essential for maintaining energy and strength during emergencies.
The fiber content begins at around 1g (5% of the daily value), but you can boost this by opting for whole wheat or corn tortillas. For even more fiber, try brown rice tortillas. Adding vegetables not only enhances the flavor but also increases the nutritional value. To keep sugar levels in check, use sugar-free pizza sauce and turkey pepperoni.
Allergen Considerations
Tortilla pizza is highly adaptable to dietary restrictions with a few simple swaps:
- Gluten-free: Use certified gluten-free tortillas or alternatives like gluten-free pita bread or biscuits. Ensure sauces and toppings are also gluten-free.
- Dairy-free: Replace cheese with dairy-free options made from cashews, almonds, or coconut oil. Pair with tomato-based sauces or dairy-free pesto.
- Vegan: Use plant-based cheeses and top with vegetables or vegan meats.
- Low-carb: Choose cauliflower crusts or low-carb tortillas and load up on vegetables and lower-carb cheeses.
- Low-sodium: Opt for reduced-sodium pizza sauce and fresh, naturally low-sodium toppings like vegetables and low-sodium cheese.
This versatile meal can be tailored to meet a variety of needs while still delivering on taste and nutrition.
6. Southwest Sweet Potato Stew
Southwest Sweet Potato Stew brings together hearty ingredients and bold Southwest spices, making it a flavorful and practical choice for emergency food storage. Packed with sweet potatoes, black beans, and bell peppers in a spiced broth, this dish is as satisfying as it is nutritious. Thanks to its shelf-stable ingredients, it’s perfect for long-term preparedness when preserved through canning or freezing.
Shelf Life
When properly canned, Southwest Sweet Potato Stew can last anywhere from 2 to 5 years at room temperature. To maintain its quality, store canned stew in a cool, dry spot below 85°F. Be cautious, though – temperatures above 100°F can compromise both its safety and flavor.
For homemade versions, cooked sweet potatoes can be stored in the refrigerator for 3 to 5 days in an airtight container. If you’re planning to freeze larger batches, mash the sweet potato flesh with a bit of lemon juice to prevent discoloration, then store it in airtight containers or heavy-duty freezer bags for up to six months. Once opened, any unused stew should be transferred to a glass or plastic container and refrigerated immediately.
Preparation Methods
This stew is versatile and can be prepared using a variety of methods:
- Pressure Cooker: Cook for 12 minutes at medium-high pressure.
- Slow Cooker: Let it simmer for 10–12 hours on low.
- Stovetop: Simmer for about 30 minutes.
For emergency situations, simply combine all the ingredients in one pot. You can also prep the stew as a freezer meal – just thaw and heat when needed. Popular garnishes include shredded cabbage, lime juice, fresh cilantro, or tortilla chips for added flavor and texture.
Nutritional Highlights
This stew isn’t just tasty – it’s packed with nutrients. A single cup (237.9g) provides:
- 194 calories
- 3.9g protein
- 38.8g carbohydrates
- 5.8g fiber (21% Daily Value)
Sweet potatoes are a powerhouse of vitamins, offering abundant amounts of vitamins A and C, beta-carotene, potassium, and iron. Black beans, on the other hand, contribute fiber and plant-based protein, making this stew an excellent choice for emergency nutrition. A serving from EatingWell‘s recipe delivers 12,081 IU of Vitamin A (242% Daily Value) and 56mg of Vitamin C (62% Daily Value).
Beyond basic nutrition, sweet potatoes are rich in phytochemicals that may help reduce inflammation and support immune health by influencing immune cell activity. Historically, they’ve even been used as a remedy for diarrhea and other digestive issues.
Allergen Considerations
This stew is naturally vegetarian, vegan, and gluten-free when prepared with standard ingredients. However, it’s always a good idea to double-check that any added seasonings or broths are certified gluten-free. For those watching their sodium intake, note that one serving contains 485mg of sodium (21% Daily Value). To reduce this, opt for low-sodium broth or cut back on added salt.
sbb-itb-1a93acd
7. Ready-to-Eat Soups and Stews
Ready-to-eat soups and stews are a lifesaver when convenience and nutrition are top priorities. These canned meals are easy to prepare – just open, heat, and enjoy – making them a practical choice when cooking isn’t an option.
Shelf Life
Canned soups and stews are a reliable addition to any emergency food supply due to their long shelf life. Low-acid options, like chicken stew, beef soup, and vegetable-based varieties, can last anywhere from 2 to 5 years when stored properly. On the other hand, high-acid soups, such as tomato-based options, typically stay fresh for 12 to 18 months.
For the best storage conditions, keep them in a cool, dry spot below 85°F. Avoid exposing them to temperatures above 100°F, as this could affect the safety and quality of the food.
Inspect cans regularly. Stay away from cans that are bulging, rusted, leaking, or heavily dented. Rotate your stock frequently, using older items first to ensure freshness and safety.
Preparation Required
While most soups and stews can be eaten straight from the can, heating them improves both flavor and safety. To heat, boil the contents in a saucepan for 10 minutes if you’re at an altitude below 1,000 feet. Add one extra minute for every additional 1,000 feet of elevation.
Once opened, transfer leftovers to a glass or plastic container and refrigerate immediately. For the best quality, consume these within 3 to 4 days. With minimal effort, these meals provide a quick solution packed with essential nutrients, perfect for emergency situations.
Nutritional Highlights
Soups and stews offer a solid nutritional boost during emergencies. They not only help increase vegetable intake but also provide hydration, aid digestion, and help you feel full. Packed with essential vitamins and minerals, these meals support your overall health when it matters most.
The high water content in soups helps with hydration and portion control, while the fiber from vegetables aids digestion. Studies even suggest that regular soup eaters tend to have lower body weight and smaller waistlines. Plus, soup can help curb hunger and promote a sense of fullness.
For an extra nutritional punch, choose soups with protein-rich ingredients like beans or chicken and whole grains such as barley, farro, or brown rice. These additions not only enhance texture but also provide prebiotics and extra nutrients. For example, a hearty chicken soup with garlic, onions, celery, and carrots might even help fend off the common cold.
Allergen Considerations
Always check labels for potential allergens like milk, eggs, fish, shellfish, tree nuts, peanuts, wheat, soy, and sesame. If you have specific allergies, steer clear of products with unclear ingredient lists. Additionally, opt for low-sodium and BPA-free options when available.
Keep in mind, many canned soups may contain wheat (often in noodles or as thickeners), milk products, and soy. Sodium content can also be a concern – just one cup of canned chicken noodle soup may contain up to 80% of your recommended daily sodium intake. If you’re watching your sodium levels, look for low-sodium options with 140 to 200 milligrams per serving. For added safety, choose cans labeled "BPA-free" to reduce potential chemical exposure.
8. Granola Bars and Trail Mix
When emergencies strike, having quick, reliable snacks can make all the difference. Granola bars and trail mix are perfect for these situations – they’re easy to store, packed with nutrients, and require no preparation. While these snacks were originally popular with outdoor enthusiasts, they’ve become a go-to option for anyone looking for fast energy during challenging times.
Shelf Life
Granola bars generally stay fresh for 6 to 8 months after they’re made. For instance, Nature Valley granola bars have a shelf life of 248 days from the manufacturing date. Trail mix lasts a bit longer, typically 6 to 12 months, as long as it’s stored in a cool, dry place. However, the nuts and dried fruits in trail mix can spoil over time, so it’s smart to check for unusual smells or flavors before eating.
It’s worth noting that food expiration dates usually indicate quality, not safety. A 2012 study found that Americans waste about $165 billion worth of food each year, with 91% of people tossing items based solely on the "sell by" date. This means your granola bars and trail mix might still be good even after their printed dates.
No Prep Needed
One of the best things about granola bars and trail mix is that they’re ready to eat straight out of the package. No water, heating, or extra steps are required, making them ideal for emergency situations.
Nutritional Highlights
These snacks pack a punch when it comes to energy and nutrients. Nuts and seeds in both granola bars and trail mix provide healthy fats – like polyunsaturated and monounsaturated fats – along with protein to support muscle repair and maintenance.
Here’s a quick look at the nutritional breakdown of some popular granola bars:
| Snack Option | Calories | Protein | Fiber |
|---|---|---|---|
| Millville Trail Mix Chewy Granola Bars (1 bar) | 150 | 2g | 7g (25% DV) |
| General Mills Fruit & Nut Chewy Granola Bars (1 bar) | 140 | 3g | 2g |
| Nature Valley Trail Mix Granola Bar, Fruit & Nut (1 bar) | 150 | 3g | 2g |
Some granola bars, like Millville’s, offer a solid 7g of fiber per bar, which helps with digestion and keeps you feeling full longer. Protein content across these options ranges from 2–3g per bar, providing support for muscle function. Similarly, a 1/4 cup serving (about 35 grams) of trail mix delivers a concentrated dose of calories and nutrients. These features make granola bars and trail mix an easy and efficient way to boost your emergency food supply.
Watch Out for Allergens
If you have allergies, keep in mind that granola bars and trail mix often include common allergens like peanuts and tree nuts. Always check ingredient labels and look for warnings about cross-contamination. If you want full control over what goes into your snacks, making your own trail mix is a great option.
9. MREs (Meals-Ready-to-Eat)
MREs have earned their reputation as a go-to option for emergency food. Originally designed for military use, these all-in-one meals are now a popular choice for civilian emergency kits. Each MRE packs around 1,250 calories and comes with a variety of essentials like utensils, seasonings, matches, napkins, drink powders, and even toilet paper.
Preparation Required
One of the biggest perks of MREs is their convenience. As an Amazon.com retailer aptly puts it:
"Ready-to-Eat Military Meals – Authentic MREs (Meals Ready to Eat) inspired by U.S. military standards; no cooking, refrigeration, or preparation required – just open and enjoy."
You can eat MREs straight out of the package without any cooking or refrigeration. While they’re ready to eat cold, many people prefer warming them up. Most MREs include a Flameless Ration Heater (FRH) that activates with just a splash of water. If an FRH isn’t available, you can heat the pouch by placing it in boiling water for about five minutes or by using a heat source like a fire.
Shelf Life
The shelf life of MREs largely depends on storage conditions, particularly temperature. According to the U.S. Army’s Natick Research Laboratories, MREs stored at 75°F can last over seven years, while those kept at 60°F can remain good for more than a decade. Here’s a quick breakdown of how temperature affects their longevity:
| Storage Temperature | Shelf Life |
|---|---|
| 100°F | 22 months (1.8 years) |
| 90°F | 55 months (4.5 years) |
| 85°F | 60 months (5 years) |
| 80°F | 76 months (6.3 years) |
| 75°F | 88 months (7.3 years) |
| 70°F | 100 months (8.3 years) |
| 60°F | 130+ months (10.8+ years) |
For the best results, store MREs in a cool, dry, and dark place, away from temperature swings. Keep them off the ground and avoid freezing them to prevent damage to the packaging.
MREs typically display a manufacturing date rather than an expiration date. While they often remain safe to eat well past their printed dates, their taste and nutritional quality may diminish over time. To check freshness, look for Time and Temperature Indicators (TTIs) on the packaging. If the inner circle is lighter than the outer circle, the meal is still considered good.
Nutritional Highlights
MREs are not just about convenience – they’re designed to deliver a balanced mix of energy and nutrients. Each meal provides about 1,250 calories and is sealed in retort packaging, which locks out oxygen and bacteria to preserve its nutritional value.
Allergen Considerations
Since MREs are complete meals, they often contain a variety of ingredients that could trigger allergies, such as dairy, wheat, soy, or nuts. Always check the menu descriptions for potential allergens. Additionally, inspect the packaging for any signs of damage or swelling to ensure the meal hasn’t been compromised.
MREs combine long shelf life, nutritional value, and ease of use, making them an excellent choice for emergency preparedness. Their durability and thoughtful design ensure they’ll be ready when you need them most.
10. Jerky and Dried Fruit Packs
Jerky and dried fruit packs are excellent additions to your emergency food supply, offering a convenient, long-lasting source of energy and nutrients. These snacks are lightweight, easy to store, and require no preparation, making them ideal for emergencies. The dehydration process not only preserves flavor but also prevents bacterial growth, ensuring their safety over time.
Nutritional Highlights
Jerky is a powerhouse of protein. For instance, an ounce of beef jerky contains 9 grams of protein. A full cup of jerky pieces provides approximately 369 calories, 30 grams of protein, 23 grams of fat, and 10 grams of carbohydrates. It’s also rich in essential minerals like zinc (21% of the daily value per ounce) and iron (8% of the daily value per ounce).
Dried fruit, on the other hand, balances out the protein-heavy nature of jerky with fiber, vitamins, and natural sugars for a quick energy boost. For example, dried apricots pack more fiber, potassium, iron, and calcium compared to their fresh counterparts. A handful of raisins (about 60 pieces) delivers around 17 grams of sugar. However, keep in mind that while drying preserves nutrients, it also concentrates sugars and calories.
Proper storage is key to maintaining the quality and safety of these snacks during emergencies.
Shelf Life
To maximize shelf life, store jerky and dried fruit in airtight containers, away from heat and direct sunlight. Unopened, commercially packaged dried fruit can last 6–12 months in the pantry, 1–2 years in the refrigerator, and indefinitely in the freezer. Once opened, dried fruit stays fresh for up to 6 months if kept in a cool, dry place in an airtight container.
Jerky, when vacuum-sealed with oxygen absorbers and stored in a cool, dry environment, can last up to a year. Freezing can extend its quality even further. Temperature plays a significant role in longevity – dried fruits can last up to a year at 60°F but only about 6 months at 80°F. Regularly check for signs of spoilage or moisture reabsorption to ensure these foods remain safe to eat.
Allergen Considerations
While jerky and dried fruit are generally straightforward options, they may include allergens. For jerky, ingredients like soy sauce (often wheat-based) and sugarcane can pose issues for individuals with gluten sensitivities or allergies. Some varieties may also contain nuts, which are common allergens. Soy-based jerky alternatives can trigger reactions in those sensitive to soy, with symptoms ranging from itching and hives to nausea and vomiting.
Dried fruits are typically safe but may contain added sugars or preservatives. Opt for varieties without added sugars to keep their nutritional benefits intact. Always read labels carefully to identify potential allergens and select options that suit your dietary needs.
These snacks are a practical, nutrient-packed choice for emergency preparedness, provided they are stored properly and chosen with dietary considerations in mind.
Meal Comparison Chart
Selecting the right emergency meals becomes much simpler when you can compare important factors side by side. Below is a chart that outlines the shelf life, preparation requirements, nutritional benefits, and common allergens for 10 different meal options included in this guide.
| Meal Option | Shelf Life | Preparation | Nutritional Highlights | Common Allergens |
|---|---|---|---|---|
| Peanut Butter and Crackers | 6–12 months (crackers), 2–3 years (peanut butter) | No prep required | High protein (8g per 2 tbsp), healthy fats, fiber | Peanuts, gluten, soy |
| Canned Tuna/Chicken Salad Kits | 2–5 years (canned), 18 months (retort pouches) | Minimal mixing | High protein (20–25g per serving), omega-3 fatty acids | Fish, eggs, soy |
| Bean Salad Wraps/Dips | 2–5 years (canned beans) | Light preparation | High fiber, plant protein (15g per cup), folate | Typically none |
| Instant Oatmeal with Dried Fruit | 12–18 months (oatmeal), 6–12 months (dried fruit) | Hot water required | Complex carbohydrates, fiber, vitamins from fruit | Gluten (some brands) |
| Emergency Tortilla Pizza | 6–12 months (tortillas), 2–5 years (sauce) | Light cooking preferred | Carbohydrates, customizable nutrition | Gluten, dairy |
| Southwest Sweet Potato Stew | 2–5 years (canned ingredients) | Heating required | Beta-carotene, fiber, potassium | Typically none |
| Ready-to-Eat Soups/Stews | 2–5 years (canned), 12–18 months (high-acid) | Heating optional | Balanced macronutrients, sodium for electrolytes | Varies by product |
| Granola Bars and Trail Mix | 6–12 months | No prep required | Quick energy, healthy fats, protein | Nuts, gluten, soy |
| MREs | 5–10 years (varies with temperature) | Self-heating or cold | Complete balanced meals, 1,200+ calories | Varies by entrée |
| Jerky and Dried Fruit Packs | 12 months (jerky), 6–12 months (dried fruit) | No prep required | High protein (9g per oz jerky), concentrated vitamins | Soy, gluten, nuts |
This chart is a handy tool for identifying which meal options align with your emergency preparedness needs. It highlights the trade-offs between factors like shelf life, ease of preparation, and allergen risks.
Some key takeaways include the impressive longevity of freeze-dried foods, which can last up to 25 years, making them the longest-lasting choice. Canned goods, on the other hand, generally have a shelf life of 2 to 5 years. Unique items like MREs stand out for their convenience and shelf life of 5 to 10 years, though extreme temperatures can significantly shorten their usability – lasting only 1 month at 120°F compared to up to 7 years at 60°F. Similarly, USDA Dried Egg Mix can last 12 to 15 months when stored below 50°F, and most dehydrated foods remain good for 1 to 2 years.
Proper storage is essential for maximizing the shelf life of emergency food. Keep items in cool, dry places, away from sunlight and heat. Airtight containers help prevent oxygen exposure, and rotating stock – using older items first – ensures freshness.
No single meal option is perfect across all categories. For example, MREs are convenient and calorie-dense but may contain multiple allergens. Meanwhile, simpler options like peanut butter and crackers are easy to prepare and nutritious but have shorter shelf lives. By monitoring expiration dates and maintaining a well-rounded inventory, you can build an emergency food supply that meets your household’s specific needs.
Food Storage and Organization Tips
Keeping your emergency food supply fresh, accessible, and safe requires proper storage and a bit of planning. By following these tips, you can ensure your shelf-stable meals are ready when you need them most. A good system for storing and rotating your supplies is key to maintaining their quality over time.
Temperature and Environment Control
Store your emergency food in a place that’s cool, dry, and dark. Avoid areas with extreme temperature swings or direct sunlight. For canned goods, maintain temperatures between freezing and 85°F. Dry ingredients should always be stored off the floor to prevent moisture buildup and keep pests at bay.
Container Selection and Protection
Airtight containers are your best friend when it comes to keeping food safe from moisture and pests. For extra protection, wrap items like cookies and crackers in plastic bags before placing them in airtight containers. Transfer opened packages of sugar, dried fruits, and nuts into screw-top jars. If you’re using Mylar bags with oxygen absorbers for long-term storage, make sure the food you’re storing has less than 10% moisture.
Once your food is properly sealed, labeling is the next step.
Labeling and Dating Systems
Clearly label each item with its name, quantity, and the date it was purchased or opened. If certain items are reserved for emergencies, mark them as "Emergency" or "Disaster Food" to avoid using them accidentally in everyday meals.
Rotation Strategies
Use a "first in, first out" approach to rotate your stock. Regularly inspect your supplies and use older items first. Non-perishable canned and dry foods should be rotated once or twice a year. For canned goods stored longer than a year, aim to rotate them every two to four years.
"Long-term food storage isn’t just piling cans in the pantry – it’s about creating a nutritionally balanced, shelf-stable pantry that can sustain your household through weeks or even years of supply-chain collapse." – Rebekah Brown, Author
Inventory Management Tools
Tools like Ready Prep Lists offer downloadable checklists and inventory trackers to help you stay on top of expiration dates and rotation schedules. They also help you account for dietary needs, ensuring your emergency stock is both balanced and effective.
Monthly Inspection Routine
Set aside time each month to review your storage. Check expiration dates, inspect containers for damage or spoilage, and discard any bulging or damaged cans to avoid health risks.
Storage Location Optimization
Organize your food by type and expiration date. Place items with shorter shelf lives in easily accessible spots, keeping longer-term supplies separate. For instance, white rice, when stored properly, can last up to 30 years, making it a great staple for your emergency pantry. Milled rice tends to stay fresh longer than brown rice, so plan your storage accordingly. Keep in mind that short-term storage methods differ from those needed for long-term preservation.
Conclusion
Creating a dependable emergency food supply starts with stocking up on shelf-stable meals that offer balanced nutrition, convenience, and long shelf lives. The ten meal options highlighted in this guide provide a strong starting point for any emergency plan, ranging from quick energy boosters like granola bars to complete meals like MREs, which can last over seven years when stored at 60°F. These choices not only meet nutritional needs but also help maintain morale during challenging times.
As Elizabeth Andress wisely points out:
"In an emergency, generally you tend to think of meeting more basic needs than preferences and flavors. But if you plan right, you can have a great variety of foods and nutrients".
This thoughtful planning ensures your family stays nourished and comforted with familiar, satisfying meals during a crisis.
Emergency preparedness is becoming a priority for many American households. In 2021, 45% of Americans reported assembling or updating their emergency supplies, recognizing that disasters often strike without warning. Whether it’s a weather-related event, power outage, transportation delay, or public health issue, having a well-stocked pantry can reduce stress and provide peace of mind.
Beyond emergencies, these food supplies can also support your day-to-day meal planning. Many long-lasting items, such as canned goods that remain good for over two years or properly stored rice and beans that can last up to 30 years, serve as practical and economical backups for everyday use.
To make managing your stockpile easier, tools like Ready Prep Lists offer checklists and inventory systems to track expiration dates and organize your supplies. These resources turn what might seem like an overwhelming task into a simple, structured process.
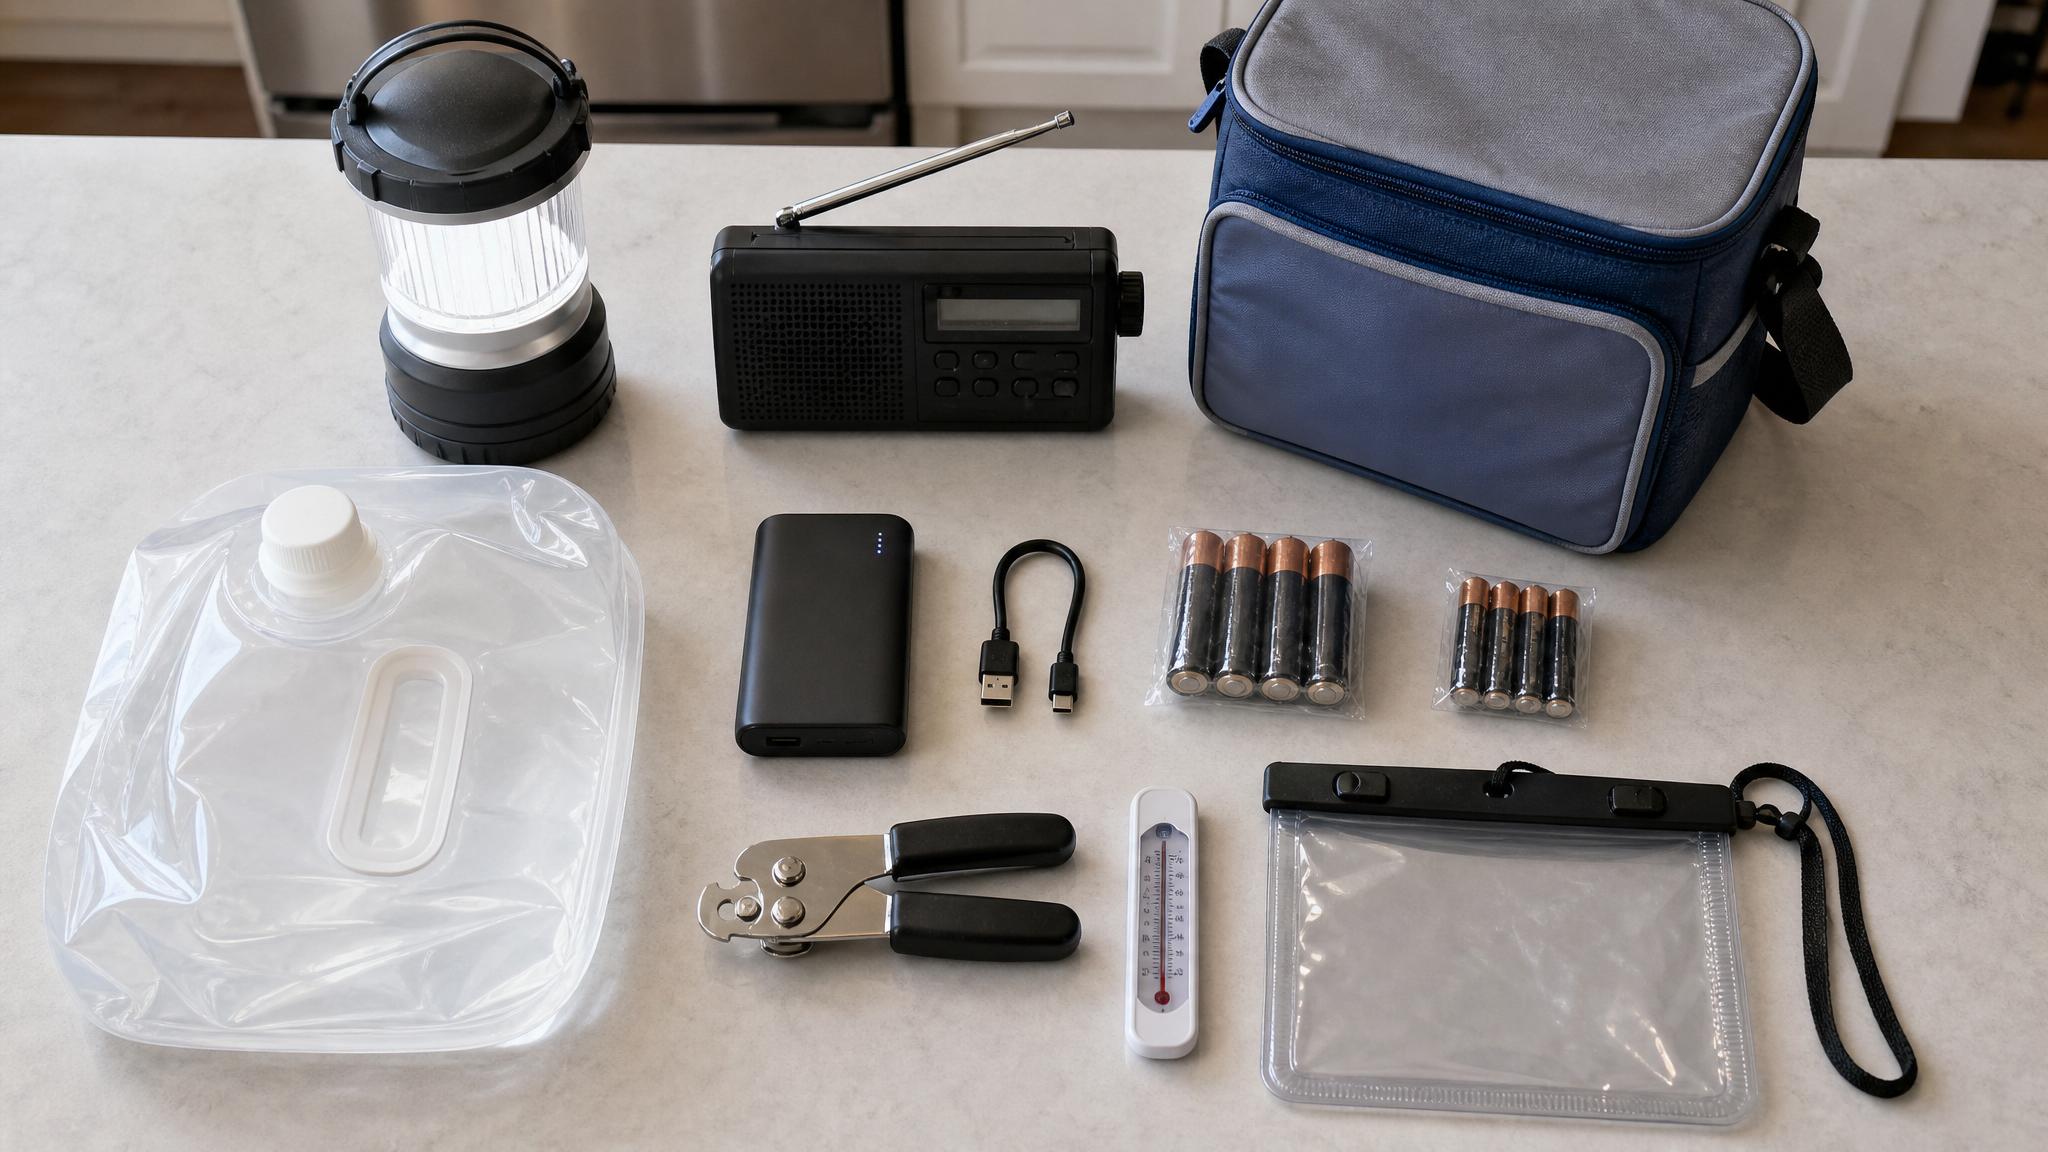
Don’t forget to include essential items like manual can openers, disposable utensils, alternative cooking methods, and at least one gallon of water per person per day. Pair your food supply with the right gear, as outlined in our storage guidelines, to create a comprehensive and reliable emergency plan. With careful planning, proper storage, and regular rotation, you’ll build a system that keeps your family safe and prepared when it matters most.
Start building your emergency food supply today – future you will be grateful.
FAQs
How can I store emergency food to keep it fresh for as long as possible?
To keep your emergency food fresh and safe, store it in a cool, dry, and dark spot, ideally where the temperature stays below 75°F. Use airtight containers to shield it from pests and moisture. For even better preservation, try vacuum sealing or packing food in Mylar bags with oxygen absorbers.
Steer clear of placing food in direct sunlight, areas with high humidity, or spots prone to temperature changes – these conditions can cut down its shelf life. Make it a habit to check your supplies regularly, swapping out items that are close to expiring and replacing them with fresh ones. Taking these steps will help maintain the quality and nutritional value of your emergency food stash.
How can I make sure my emergency food supply meets my family’s dietary needs and restrictions?
To make sure your emergency food supply meets everyone’s needs in your household, start by considering any specific dietary requirements. This includes allergies, medical conditions, or even personal preferences. For example, you might need to include options that are gluten-free, diabetic-friendly, or vegetarian.
Stock up on a mix of shelf-stable foods that align with these needs. Think canned goods, dried fruits, or pre-packaged meals tailored to specific diets. It’s also a good idea to check your supply regularly – this ensures you’re staying on top of any changes in dietary needs and rotating items before they expire. By doing so, you can rest easy knowing your emergency meals are both safe and suitable for everyone at home.
How can I use emergency food supplies in everyday meals to keep them fresh and avoid waste?
To get the most out of your emergency food stash and avoid waste, consider using the FIFO (First-In, First-Out) method. Simply place newer items behind older ones in your pantry. This way, the older items get used first, keeping your stock fresh and minimizing waste.
Store grains, canned goods, and other shelf-stable foods in airtight containers, and make sure to label them with purchase or expiration dates. For the best results, keep these items in a cool, dark, and dry spot to maximize their shelf life. It’s also a good idea to routinely check your pantry and freezer to see what’s on hand. This way, you can work these items into your weekly meals before they reach their expiration dates.
By rotating your supplies and planning meals around what you have, you’ll not only cut down on waste but also stay familiar with the foods in your emergency kit. This can make them much easier to use if you ever need them in a real emergency.